
Stencil printing is a fast, affordable, and reliable way to create repeatable designs on fabric, wood, walls, and other surfaces. Whether you run a small custom apparel shop or want to tackle DIY projects at home, learning the right technique saves you time, money, and frustration. This guide walks you through everything you need to know to get clean, professional results from your very first print.
You will learn how stencil printers work, how to prepare your workspace, the correct printing process, and how to troubleshoot common issues. By the end, you will feel confident enough to start producing crisp, consistent designs on your own.
What Is a Stencil Printer and How Does It Work
A stencil printer is a machine that cuts precise stencils from materials like mylar, vinyl, or thermal film. The printer uses a digital design file to direct a blade or laser, creating openings that match your image exactly.
Once the stencil is loaded into the printing frame, ink or paint is pushed through the cut openings onto your target surface. This method produces identical copies every time, which is why businesses rely on it for labeling, signage, and product marking.
Modern desktop stencil printers are compact and connect to your computer through USB. They are popular in electronics manufacturing, craft businesses, and home workshops because they eliminate the need for hand-cutting each stencil.
Choosing the Right Stencil Printer for Your Needs
Selecting the correct machine depends on the materials you plan to print on and the size of your typical designs.
Key Features to Compare
- Cutting resolution: Higher DPI means finer detail in your stencil
- Maximum stencil size: Match this to your most common project dimensions
- Material compatibility: Some printers only cut thin films, while others handle thicker mylar
- Software support: Look for printers that work with standard design programs
Matching the Printer to Your Application
If you make circuit boards, you need a printer that handles thermal stencil film. For fabric printing, a vinyl cutter works best. Wall decorators often prefer laser-cut mylar stencils for their durability across many uses.
Preparing Your Workspace and Materials
A clean, organized setup is the foundation of every successful stencil printing project.
Essential Supplies You Will Need
- Stencil printer with power and data cables
- Stencil film or sheet material compatible with your machine
- Cutting mat or feed rollers
- Design file saved in a supported format
- Squeegee, ink, or paint depending on your substrate
- Painter’s tape and a ruler for alignment
Setting Up Your Printing Area
Choose a flat, stable surface with good lighting. Keep the area free of dust because particles can clog stencil openings or smudge wet ink. Lay down protective paper if you plan to print with loose paint or dye.
Creating and Loading Your Design File
Your stencil is only as good as the file you send to the printer.
Designing for Stencil Cutting
Start with a high-contrast black and white image. Remember that stencil printers cut open areas only, so your design must account for bridges, islands, and connecting pieces that prevent small details from falling out.
Export your finished file as a vector format such as SVG or AI when possible. Vector files scale without losing sharpness, giving you cleaner cuts on the stencil film.
Sending the File to the Printer
Open your printer’s software and import the design. Set the cut line, speed, and pressure according to the material you are using. Test cuts on a scrap piece help you dial in the right settings before committing to your final stencil sheet.
Loading Stencil Film and Running a Test Cut
Correct loading prevents wasted material and uneven cuts.
Loading the Film Properly
- Feed the film into the printer with the cutting side facing the blade
- Align the edge with the starting mark on the feed tray
- Lock the rollers or place the cutting mat firmly in position
Performing a Test Cut
Run a small test shape to check pressure and depth. The blade should cut through the film cleanly without scoring the backing. Adjust pressure in small increments until the cut releases easily when you peel the film.
Cutting Your Final Stencil
Once your settings are dialed in, you are ready to produce the working stencil.
Send the full design to the printer and monitor the first few seconds of the cut. Listen for consistent blade motion and watch for skipped areas. When the job finishes, carefully remove the stencil and weed out the unwanted pieces, leaving only your design openings intact.
Store the finished stencil flat between sheets of parchment paper to prevent curling or damage to the delicate cut details.
Applying the Stencil to Your Printing Surface
Placement determines the quality of every print that follows.
Securing the Stencil
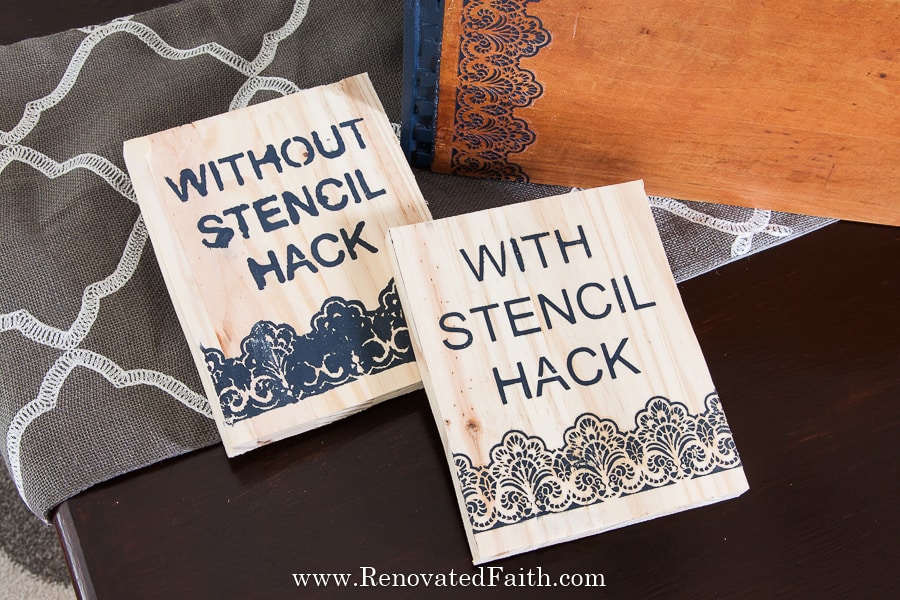
Use painter’s tape or a temporary adhesive spray to hold the stencil flat against the surface. Pull the stencil tight to eliminate wrinkles because any gap will allow ink to bleed underneath and blur your design.
Aligning Multiple Colors
For layered prints, mark registration points on your surface before placing the stencil. These marks let you reposition each color layer in the exact same spot every time.
Printing Your Design with Ink or Paint
Now comes the rewarding part: transferring your design.
Applying the Medium
- Load a small amount of ink or paint onto your squeegee or brush
- Hold the tool at a 45 degree angle to the stencil
- Pull the medium across each opening with firm, even pressure
- Apply two light coats rather than one heavy coat to prevent bleed
Lifting the Stencil Carefully
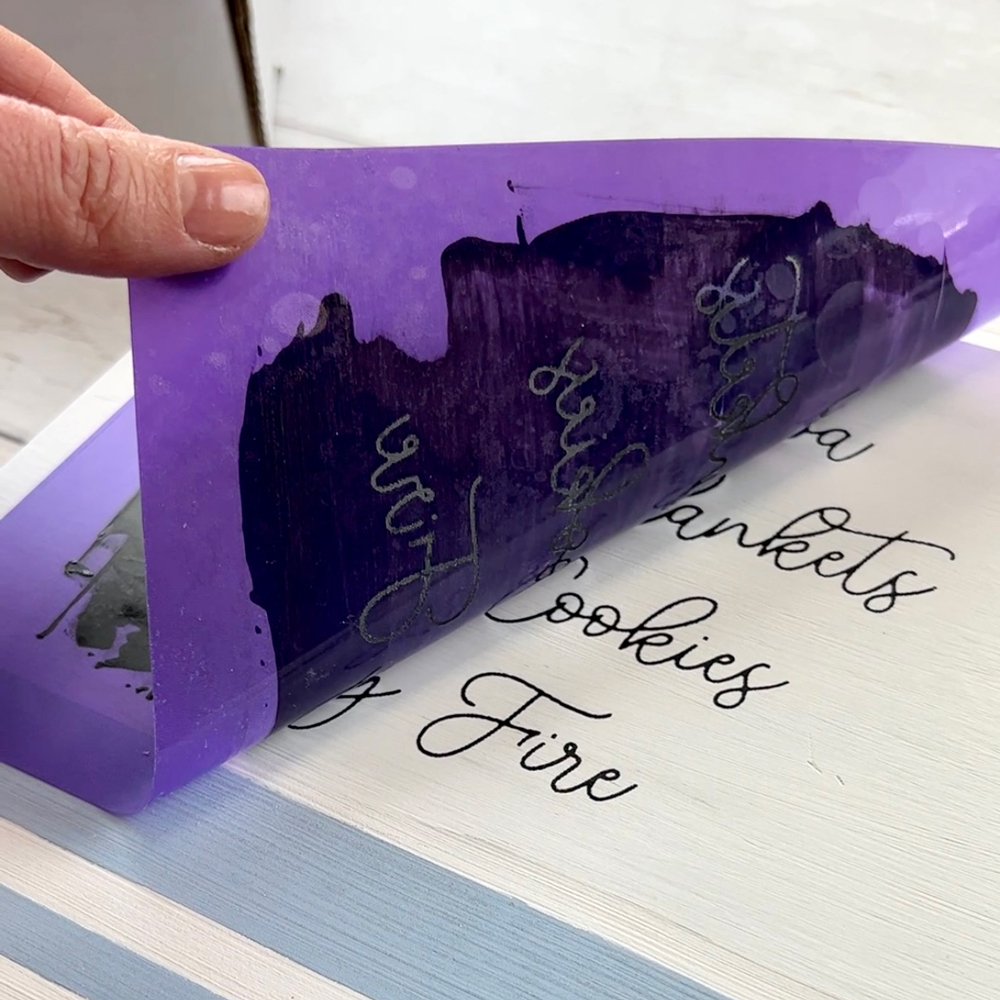
Pull the stencil straight up and away from the surface while the ink is still slightly wet. This prevents smudging and keeps your edges crisp. Clean the stencil immediately if you plan to reuse it.
Troubleshooting Common Stencil Printing Problems
Even experienced users run into occasional issues, but most have simple fixes.
Ink Bleeding Under the Stencil
This usually means the stencil was not sealed tightly. Re-tape the edges and reduce the amount of ink on your applicator. A light mist of repositionable adhesive on the back of the stencil also helps.
Torn or Damaged Stencil Details
Small bridges and letters are the most vulnerable parts. Slow down your cut speed and reduce blade pressure slightly to keep delicate areas intact. You can also add small support bridges in your design file to reinforce weak spots.
Uneven Ink Coverage
Check your squeegee for nicks and replace it if needed. Confirm that your stencil is lying flat against the surface because raised areas will print lighter than pressed areas.
Cleaning and Maintaining Your Stencil Printer
Regular maintenance extends the life of your machine and keeps cuts precise.
Wipe the blade housing and feed rollers weekly to remove film dust and residue. Replace the blade when cuts start looking rough or when you notice dragging on thicker materials. Store your printer covered to keep out dust when it is not in use.
Frequently Asked Questions About Stencil Printing
What materials can I cut with a stencil printer?
Most stencil printers handle mylar, thermal film, adhesive vinyl, and thin plastic sheets. Always check your printer’s specifications for the maximum material thickness it supports.
Do I need special software to design stencils?
You can use any vector design program such as Adobe Illustrator, CorelDRAW, or free options like Inkscape. The key requirement is exporting your file in a format your printer’s software accepts.
How long does a cut stencil last?
With proper care, a mylar stencil can produce hundreds of prints. Clean it gently after each use, store it flat, and avoid folding or creasing the cut areas.
Can stencil printers work on fabric?
Yes, when you pair them with fabric ink and a proper squeegee. Use a textile medium to keep the ink flexible and washable on the finished garment.
Why are my stencil edges rough after cutting?
Rough edges usually point to a dull blade or incorrect pressure settings. Replace the blade and run a test cut to confirm clean results before printing your final project.
Key Takeaways for Mastering Stencil Printing
Stencil printing rewards preparation and consistency. Start with a clean workspace, a well-designed file, and properly tuned machine settings. Secure your stencil flat, apply ink in light layers, and lift the stencil carefully to capture every detail. Routine cleaning of your printer and blades will keep every project looking sharp from the first print to the last.
Your next step is simple: choose a small test design, set up your printer, and produce a single practice stencil today. The skills you build on that first print will carry directly into every project you take on after.


