
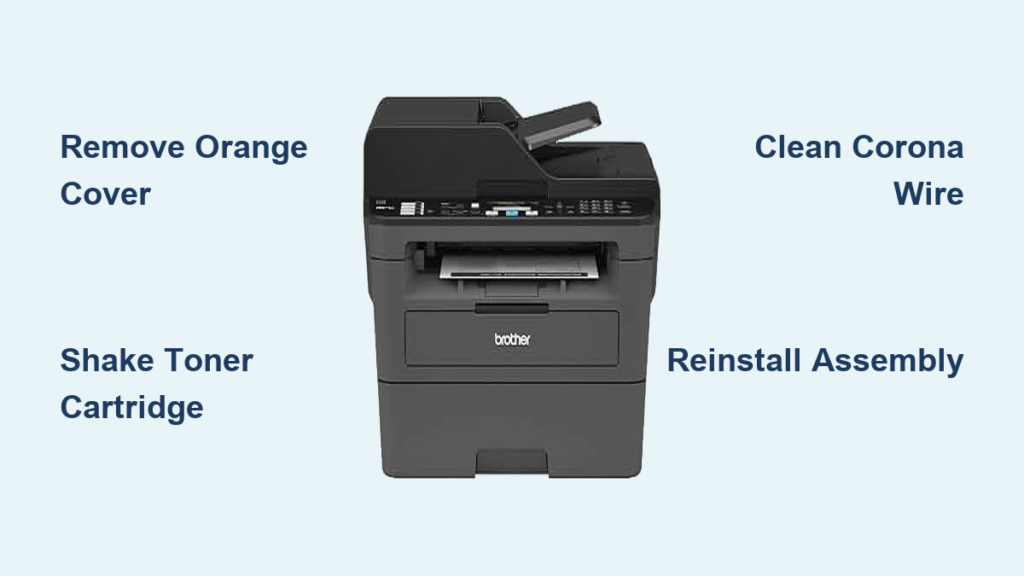
Is your Brother MFC-L2710DW printer flashing “Replace Toner” on the display? This is one of the most common maintenance tasks for home and office users. The good news is that swapping the toner takes only a few minutes, requires no tools, and can instantly restore sharp, professional prints.
In this guide, you will learn how to safely remove the old cartridge, install a new TN730 or TN760, clean the drum unit, and troubleshoot stubborn error messages. Follow along and your printer will be back to work before your coffee gets cold.
Open the Front Cover
Start by locating the front cover on the lower panel of your printer. Slide your fingers into the grooves on both sides and pull gently outward. The cover will swing open and reveal the toner cartridge secured inside the drum assembly.
Make sure the printer is powered on or in standby mode. This allows the internal rollers to settle into the correct service position before you begin handling the components.
Remove the Drum and Toner Assembly
Grip the assembly by both sides and pull it straight out of the printer. Avoid tilting it, as loose toner can spill inside the machine. Place it on a clean, flat surface lined with scrap paper to catch any stray dust or toner. Keep the assembly away from direct sunlight, since bright light can damage the drum’s imaging surface.
Take Out the Old Toner Cartridge
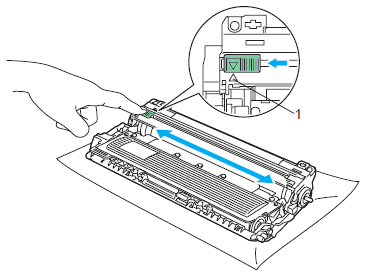
Press the Green Lock Lever
Look at the side of the toner cartridge to find the green lock lever. Press it downward firmly with your thumb until the cartridge loosens. This lever is the only mechanism holding the toner to the drum unit, so a confident press is needed.
Slide the Cartridge Out
Once the lever is released, gently slide the old cartridge out of the drum unit. Set it aside on your paper-lined surface. Be careful not to touch the shiny green drum roller or the imaging surface underneath. Skin oils on these parts cause permanent streaks and ghosting on future prints.
Prepare the New Toner Cartridge

Remove the Orange Protective Cover
Unbox the new Brother TN730 or TN760 cartridge and locate the bright orange plastic cap on one end. Pull it straight off and throw it away. Never install the cartridge with this cover still attached, or toner will not flow and the printer will throw an error.
Shake the Cartridge
Hold the cartridge horizontally and shake it side to side 5 to 10 times. This loosens and evenly distributes the toner powder inside. Skipping this step often leads to faded or patchy prints on the first few pages.
Install the New Toner Cartridge
Align and Insert the Cartridge
Slide the new cartridge into the drum unit with the “Brother” label facing you. Push it in firmly along the guide rails. You will hear a distinct click when the green lock lever snaps back into place, confirming the cartridge is secure.
Clean the Corona Wire
Cleaning the drum is a step many users skip, but it makes a big difference in print quality. Locate the green slider tab on the left side of the drum unit. Slide it from right to left three full times, then let it click back into place on the left side. This wipes residual toner off the corona wire and prevents ghosting and smudges.
Reinstall the Assembly
Slide the Assembly Back Into the Printer
Pick up the reassembled drum and toner unit and slide it back into the printer along the same path you removed it. Push gently until you feel it click into place. Partial insertion can trigger paper jams or sensor errors, so make sure it seats fully.
Close the Front Cover
Firmly close the front cover until the latch catches. The printer will automatically run a quick self-check, the rollers will spin briefly, and the display will return to ready mode.
Fix a Persistent “Toner Low” Message
Why the Message Appears
Sometimes the display still shows “Toner Low,” “Replace Toner,” or “Toner Ended” even after a fresh install. This is a known quirk and rarely indicates a real hardware failure.
Verify the Installation
Open the front cover again and confirm the following:
• The orange protective cover was removed
• The cartridge is fully clicked into place
• The green lock lever is engaged
If anything feels loose, remove the cartridge and reseat it firmly.
Reset the Toner Sensor
Close the cover and wait at least 30 seconds for the printer to register the new cartridge. If the message still appears, clean the green slider once more and reseat the assembly. In rare cases, the drum unit itself may be at the end of its life and need replacing.
Choose the Right Toner Cartridge
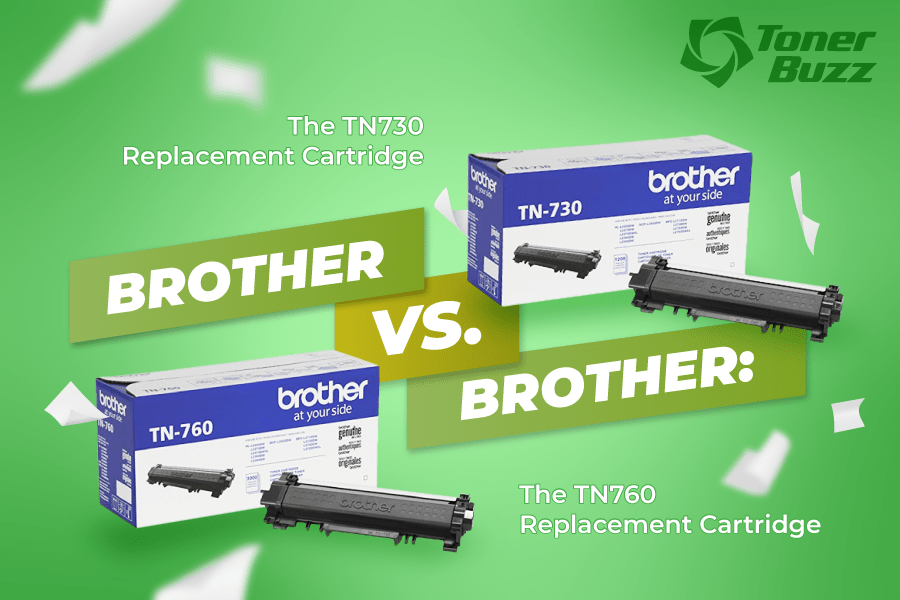
OEM vs. Compatible Options
You have three main choices for replacement toner:
• Brother TN730 standard yield, rated for about 1,200 pages
• Brother TN760 high yield, rated for about 3,000 pages
• Third-party compatible cartridges, often 50 to 70 percent cheaper
Many users report excellent results with reputable third-party brands sold on Amazon. Just verify the listing specifically lists MFC-L2710DW compatibility and check recent reviews.
Compatible Brother Models
The TN730 and TN760 cartridges also fit several other Brother printers, including:
• MFC-L2690DW
• HL-L2370DW
• DCP-L2550DW
• MFC-L2750DW
Always confirm compatibility before ordering to avoid returns.
Avoid Common Installation Mistakes
Touching the Drum Rollers
Skin oils on the green drum roller create permanent streaks and ghosting. Always handle the drum by its plastic edges.
Forgetting to Shake the Cartridge
Unshaken toner clumps inside the cartridge. The result is uneven density and faded sections on early prints.
Skipping the Corona Wire Cleaning
Residual toner on the corona wire causes repeating marks, background shading, and ghost images down the page.
Leaving the Orange Cover On
This is the number one cause of “toner not recognized” errors. The cover blocks toner flow entirely, so the printer thinks no cartridge is installed.
Maintain Print Quality Over Time
Replace the Drum When Needed
The drum unit typically lasts around 12,000 pages, much longer than a single toner cartridge. If you see streaks, spots, or ghosting after installing new toner, the drum is likely worn out. Replace it with a Brother DR730 or compatible equivalent.
Run a Test Print
After every toner change, print a quality check sheet. Navigate to Menu > Reports > Print Quality Check Sheet. This catches small issues before they show up in real documents.
Use Toner Continue Mode in a Pinch
If your printer halts with a “Toner Empty” message and you still need to print, enable Toner Continue Mode:
- Press Menu
- Go to Machine Info > Toner Continue
- Select On
This lets you squeeze out a few more pages in an emergency, though quality may drop.
Troubleshoot Print Quality Problems
Streaks or Lines
• Cause: Contaminated drum surface or worn drum unit
• Fix: Slide the green tab three times, reseat the toner, or replace the drum
Ghosting (Faint Repeating Images)
• Cause: Residual toner on the drum
• Fix: Clean the corona wire with the green slider using three or more passes
Light or Faded Prints
• Cause: Unshaken toner or low supply
• Fix: Shake the cartridge, confirm it is clicked in, or replace it
Blank Pages
• Cause: Orange cover still on the cartridge or clogged toner
• Fix: Recheck installation and confirm the cover is removed
Frequently Asked Questions About Changing Toner on the Brother MFC-L2710DW
Why does my printer still say “Replace Toner” after I installed a new cartridge?
This is a common issue. Open the front cover and confirm the orange protective cover was removed and the cartridge is fully clicked in. Clean the green slider on the drum and reseat the assembly. If the message persists, the drum unit itself may be worn.
What is the difference between the toner cartridge and the drum unit?
The toner cartridge holds the powder that forms the image on the page and gets replaced frequently. The drum unit transfers that toner onto the paper and lasts much longer, typically around 12,000 pages. Both are separate parts with different replacement schedules.
Can I use third-party toner cartridges in my Brother MFC-L2710DW?
Yes. Many compatible TN730 and TN760 cartridges from reputable third-party brands work well and cost significantly less than OEM Brother cartridges. Just verify the listing lists MFC-L2710DW compatibility and check buyer reviews.
How do I enable Toner Continue Mode?
Press Menu, navigate to Machine Info > Toner Continue, and select On. This allows the printer to keep printing when toner runs low, which is useful for urgent jobs.
How long does the toner replacement process take?
Most users finish the entire swap in about 3 to 5 minutes. The printer runs a brief self-check after the cover closes, so you can start printing almost immediately.
How do I know if my drum unit needs replacing?
If you notice persistent streaks, spots, or ghosting even after installing a new toner cartridge and cleaning the corona wire, the drum is likely worn out. Replace it with a Brother DR730 or compatible drum.
Final Thoughts on Changing Toner on Your Brother MFC-L2710DW
Changing the toner on your Brother MFC-L2710DW is one of the easiest ways to keep your printer running smoothly. The three most important steps are removing the orange protective cover, shaking the cartridge before installation, and cleaning the corona wire with the green slider. These simple actions prevent the vast majority of error messages and print quality issues.
Next time the display asks for new toner, grab a TN760 high-yield cartridge for fewer swaps, follow the steps above, and your printer will be back to producing crisp documents in just a few minutes.


