

You just unboxed your Instax Mini Link 3 and want to start printing instant photos from your phone, but the setup process feels unfamiliar. Unlike traditional printers, this compact device connects wirelessly and requires a dedicated app to unlock its full potential. Many first-time users get stuck at the charging step, the Bluetooth pairing screen, or aligning the film correctly.
This complete guide on how to use Instax mini printer walks you through every stage, from the first charge to advanced features like AR effects and camera printing. You’ll learn the exact steps for setup, film loading, app pairing, creative printing modes, troubleshooting, and long-term maintenance. By the end, you’ll be able to print vibrant 3×2 inch photos from your smartphone or Fujifilm camera with confidence.
Charge the Printer Before First Use
Plug In for Two Hours Using USB-C
Your new Instax Mini Link 3 arrives with little or no battery. It cannot connect via Bluetooth until it has enough charge, so this step comes first. Use the USB-C cable and charge the device for about two hours.
The charging port sits on the right side of the printer. There is no external charging indicator, so check the battery level through the app once paired or by pressing the function button after powering on. The printer will not pair while plugged in, so wait until charging is complete before attempting setup.
Power On the Instax Mini Link and Check the Battery
Use the Side Power Button to Turn On the Device
After charging, press and hold the power button on the side of the printer until it turns on. The button has a clicky rocker design that gives tactile feedback with each press.
To check the battery level, press the function button on the side and watch the LED light pattern. A solid light means high battery, pulsing means medium, and flashing means low. You can also view battery status inside the app once paired.
Download and Set Up the Instax Mini Link App
Install From the App Store or Google Play
The instax mini Link app is required for all printing functions. It is free, available on both iOS and Android, and requires no account to use. The app works offline after installation, making it convenient for travel and events.
iPhone (iOS) permissions to grant:
- Photos: Select “Full Access” on iOS 17 or “All photos” on iOS 16
- Bluetooth: Enable
- Camera: Enable
Go to Settings > mini Link and verify all three are allowed.
Android permissions to grant:
- Camera: Allow only while using the app
- Photos and videos (Android 13/14): Allow
- Files and media (Android 12/13): Allow media access only
- Location: Allow only while using the app, with precise location enabled
Bluetooth requires location services enabled on Android for device discovery, so do not skip this step.
Pair the Instax Mini Link via Bluetooth
Connect for the First Time in a Few Taps
Pairing your printer with your smartphone is straightforward once permissions are set.
- Turn on the printer
- Open the instax mini Link app
- Tap Add New Device
- Ensure Bluetooth is enabled on your phone
- Select your printer (listed as INSTAX-XXXXXXX)
- Confirm the connection
If two pop-up windows appear, tap Pair on both. A successful connection displays your printer name in the app and signals it is ready to print.
Fix Pairing Problems by Removing Old Devices
If you are switching phones or experiencing connection issues, clear old Bluetooth entries first.
- Open your phone’s Bluetooth settings
- Find any saved INSTAX-XXXXXXX devices
- Tap Forget or Delete
- Restart your phone
- Toggle Bluetooth off and back on
- Turn on the printer while holding the function button to force pairing mode
- Open the app and search again
Only one smartphone can connect at a time. To switch users, unpair the current device first.
Load Instax Mini Film the Right Way
Align the Yellow Marks for a Successful Load
Film is sold separately in 10-sheet packs and costs about $15 to $20 per pack, averaging $1.50 to $2.00 per print. Loading it correctly prevents wasted sheets and jamming.
- Slide the film door lock and open the back panel
- Insert a fresh Instax Mini film pack
- Align the yellow mark on the film pack with the yellow guide inside the printer
- Peel off the protective film layer
- Close the door securely
The printer automatically ejects a blank sheet. This is normal and clears the mechanism.
Critical warning: Never open the film door again until all 10 prints are used. Exposure to light will ruin the remaining sheets and waste your money.
Print Photos From Your Phone Using Simple Print
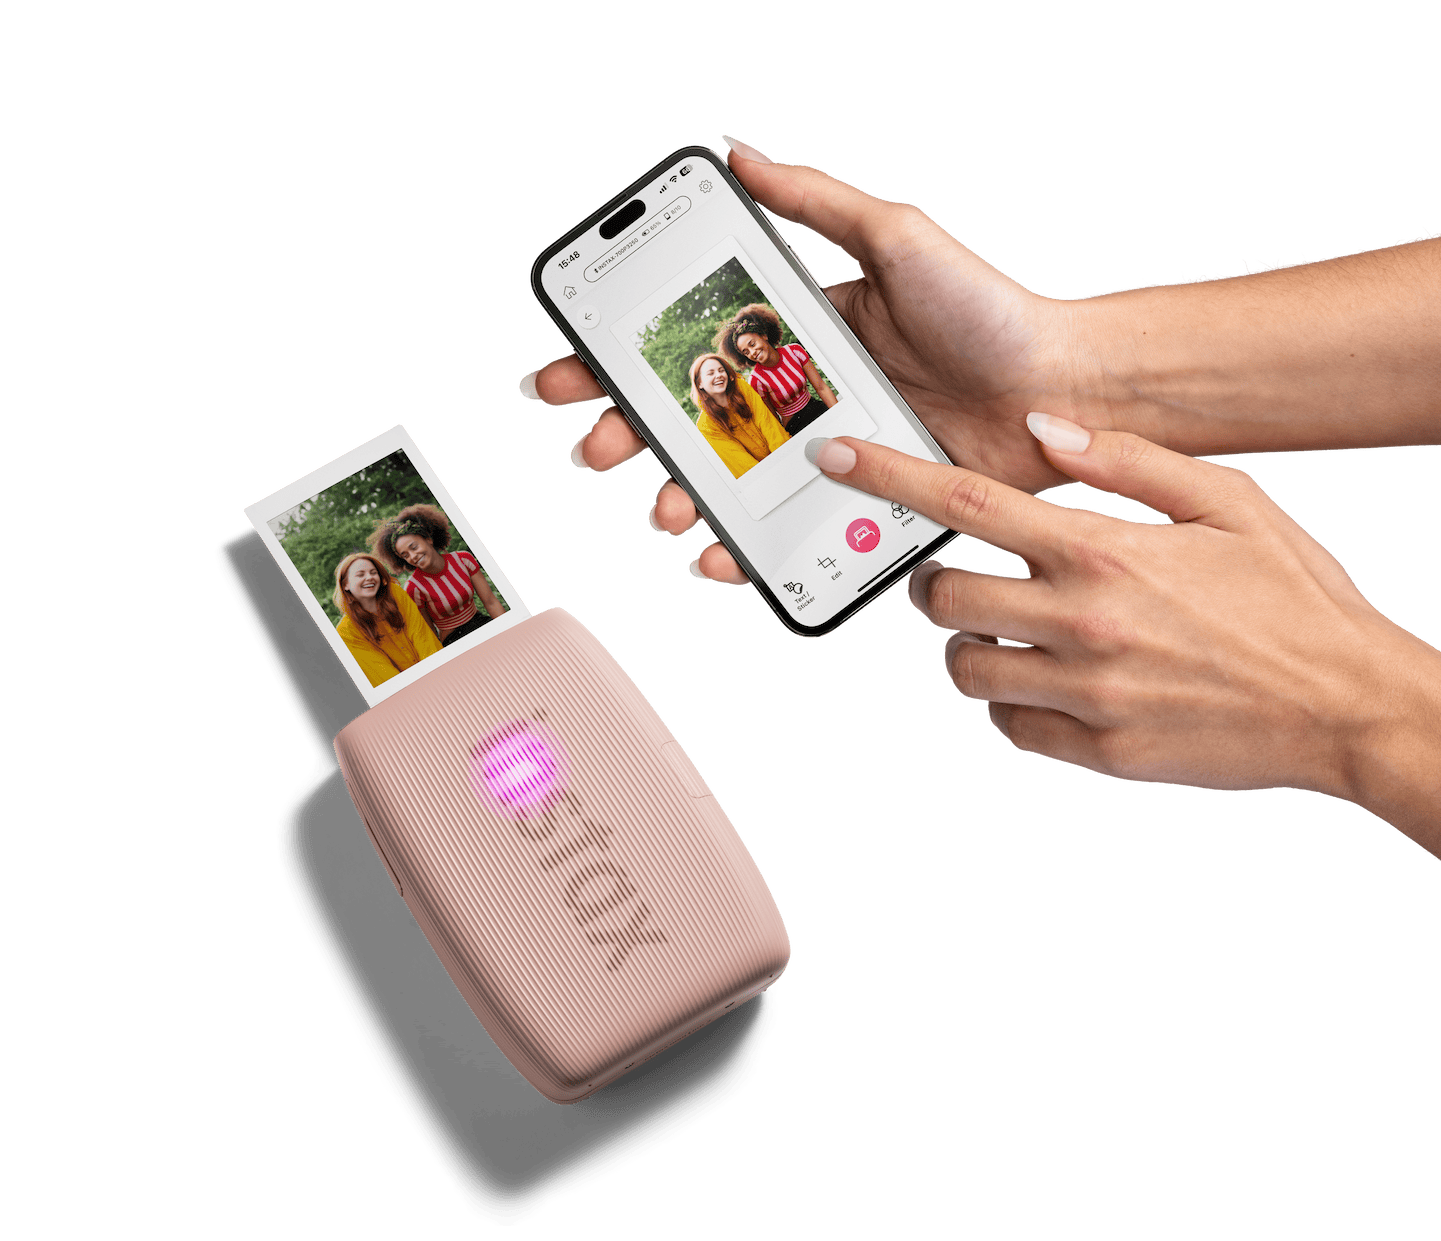
Select a Photo and Customize Before Printing
Simple Print is the most common way to use an Instax mini printer. It lets you choose any photo from your camera roll and edit it before printing.
- Open the app and select Simple Print
- Pick any photo from your gallery
- Rotate, zoom, or crop as needed
- Apply filters, stickers, frames, or add a date stamp
- Tap the Print icon
The printer feeds the film automatically. Wait about 60 seconds for the image to fully develop. You can also print short videos up to three minutes long by selecting a video file instead of a photo. Note that Android HDR videos are not supported.
Create Multi-Photo Collages With Click to Collage

Combine Up to Eight Photos Into One Print
Collage mode turns several memories into a single keepsake. It is perfect for events, trips, and gifts.
- Tap Click to Collage in the app
- Take new photos or select up to 8 from your gallery
- Choose a layout such as grid, border, or overlap
- Rearrange images by dragging them into position
- Add text, emojis, or stickers
- Tap Print
Use high-resolution images to avoid pixelation in the final print. You can also tap Save for later to preserve unfinished collages and return to them later.
Add Augmented Reality Effects With Instax AiR Studio
Place Animated Backgrounds Behind Your Subject
The AiR Studio feature uses your phone’s camera to overlay animated backgrounds, floating hearts, confetti, or cartoon characters behind your subject. This is one of the most creative features of how to use Instax mini printer.
How to use AiR Studio:
- Open the app and tap the Instax logo to enter AiR Studio
- Tap the ? icon for in-app instructions
- Slowly move your phone until the app detects the floor
- Select an AR effect such as fireworks, balloons, or animated characters
- Take a photo using your phone’s camera or import one from your gallery
Requirements and limitations:
- Android phones must support ARCore (check the app’s supported device list)
- Floor detection is required for proper placement
- AR effects cannot be moved once placed; use the Undo button to reposition
- Prolonged use may cause your phone to overheat; close and relaunch the app if this happens
Print Directly From Fujifilm X Series Cameras
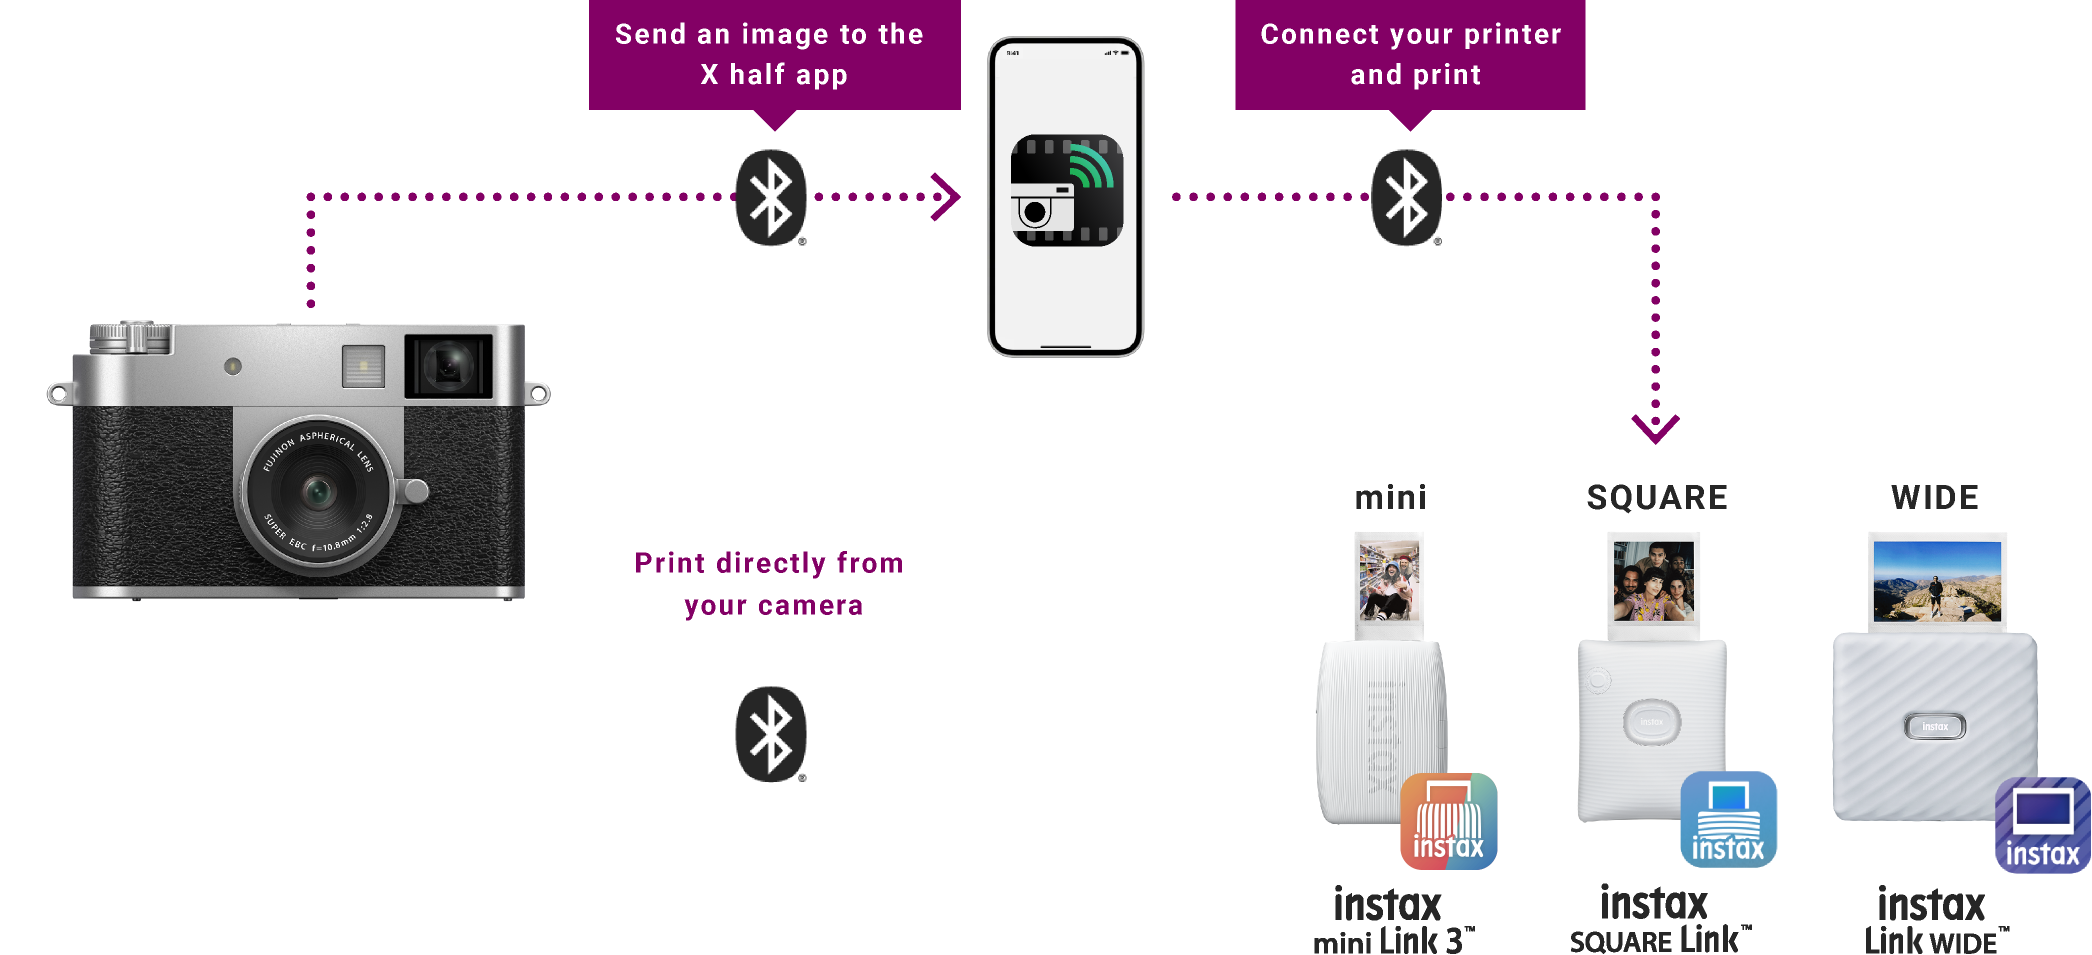
Send Images Wirelessly Without a Phone
If you own a compatible Fujifilm X Series camera such as the X-M5, X-T30 III, X-E5, or X half, you can print directly without using a smartphone.
Steps to print from an X Series camera:
- On the camera, go to Playback Menu
- Select instax PRINTER PRINT
- Choose the image you want to print
- Adjust the trim if needed
- Press OK to start printing
Before this works, pair the camera with the printer via Network/USB Settings > Bluetooth/Smartphone Settings. The Bluetooth icon turns white once connected. Use X half Single Shot mode for perfectly cropped mini-format photos.
Use Instax Camera Mode for Spontaneous Shooting
Take and Print Without Pre-Loading Photos
Camera mode lets you skip your gallery entirely and capture new shots on the spot.
- In the app, select instax Camera mode
- Point your phone’s camera at your subject
- Tilt the printer toward you to zoom in
- Tilt away to zoom out
- Press the power button to capture
You can edit the photo with filters and print it immediately. This mode is ideal for parties, gatherings, and spontaneous moments.
Reprint Your Last Photo With a Physical Shortcut
Quickly Duplicate Your Most Recent Print
If you want an extra copy of your last photo, you do not need to open the app.
- Hold the printer with the print exit slot facing down
- Press the power button
The printer reprints the last image automatically. A flickering magenta light indicates reprinting is in progress.
Limitation: Reprint data is deleted when the printer powers off, so you can only reprint the most recent image while the device is still on.
Customize Prints With Filters, Frames, and QR Codes
Add Personal Touches to Every Photo
The app gives you full creative control over each print.
- Apply vintage, black and white, or color-enhancing filters
- Add text, emojis, or decorative stickers
- Choose from dozens of frame styles, including floral, minimalist, and retro
- Customize frame color and thickness
- Insert date stamps
You can also generate a QR code on the print that links to a digital album, social media post, or video message. This is a great way to share physical keepsakes with digital extras.
Update Firmware and Adjust Printer Settings
Keep Your Device Running Smoothly
Regular firmware updates fix bugs and improve performance.
How to check for updates:
- Open the app
- Tap the Settings icon in the upper right
- Go to Printer settings > Check for firmware updates
- Follow the on-screen instructions
A blinking blue LED indicates firmware is updating. You can also set automatic power-off to conserve battery life.
Troubleshoot Common Instax Mini Link Problems
Quick Fixes for the Most Frequent Issues
Printer has no power or shows a yellow light:
- The battery is likely too low
- Charge for two hours before first use or after extended storage
Cannot connect via Bluetooth:
- Verify app permissions for Photos, Bluetooth, and Location
- Delete old INSTAX devices from your phone’s Bluetooth settings
- Restart your phone and retry
AiR Studio is not working:
- Confirm your Android phone supports ARCore
- Make sure the app detects the floor
- Close and relaunch the app if your phone overheats
Cannot reprint:
- The reprint buffer clears when powered off
- Only the most recent image can be reprinted
Film jam or yellow blinking light:
- This indicates a film discharge error
- Turn off the printer, remove the film pack carefully, reinsert it, and close the door
- Do not open the door mid-pack
Maintain and Store Your Printer Properly
Extend the Life of Your Device
- Store unused film in a cool, dark place away from direct sunlight
- Avoid printing in extreme heat or cold
- Clean the exterior with a dry cloth
- Never disassemble the printer
- Dispose of the device according to local e-waste regulations
The internal battery is non-removable and lasts approximately 20 prints per charge. A full recharge takes about two hours.
Frequently Asked Questions About Using an Instax Mini Printer
How long does it take to charge an Instax Mini Link before first use?
Charge the printer for approximately two hours using the USB-C cable. The device cannot pair via Bluetooth until it has enough battery, so a full initial charge is essential before setup.
Can I print from an Instax Mini Link without using the app?
You can print directly from compatible Fujifilm X Series cameras like the X-M5, X-T30 III, X-E5, and X half by pairing them via Bluetooth. For smartphone printing, however, the instax mini Link app is required.
Why will my Instax Mini printer not connect to Bluetooth?
Check that all required app permissions are enabled. On iOS, allow Photos, Bluetooth, and Camera. On Android, allow Camera, Location, and media access. Also delete any previously paired INSTAX devices from your phone’s Bluetooth settings and restart both devices.
How long does an Instax photo take to develop?
Instax Mini prints take approximately 60 seconds to fully develop. Colors are vibrant and slightly warmer or more saturated than the original digital image, which is part of the classic analog aesthetic.
How much does each Instax Mini print cost?
A pack of 10 Instax Mini sheets costs between $15 and $20, which works out to about $1.50 to $2.00 per print. Film must be used in full packs, so unused sheets are wasted if you stop printing mid-pack.
Can I use the Instax Mini Link app with other Instax printers?
No. The instax mini Link app is only compatible with the Instax Mini Link series. It does not work with the instax SQUARE Link app or the instax Link WIDE app, as each app is device-specific.
Final Thoughts on Mastering Your Instax Mini Printer
Learning how to use Instax mini printer comes down to three essentials: charge fully before pairing, align the yellow film marks during loading, and grant all required app permissions before connecting. Once those steps are solid, everything else, from Simple Print to AR effects and camera printing, flows naturally.
The Instax Mini Link blends digital convenience with analog charm. It turns smartphone memories into tangible keepsakes in about 60 seconds, with no ink cartridges and no internet required. For best results, use high-resolution images, store film in a cool dark place, and keep the firmware updated. Start by printing one photo today, then experiment with collages, frames, and AR effects as you grow more comfortable with the device.
Word count: ~1,200 words


