
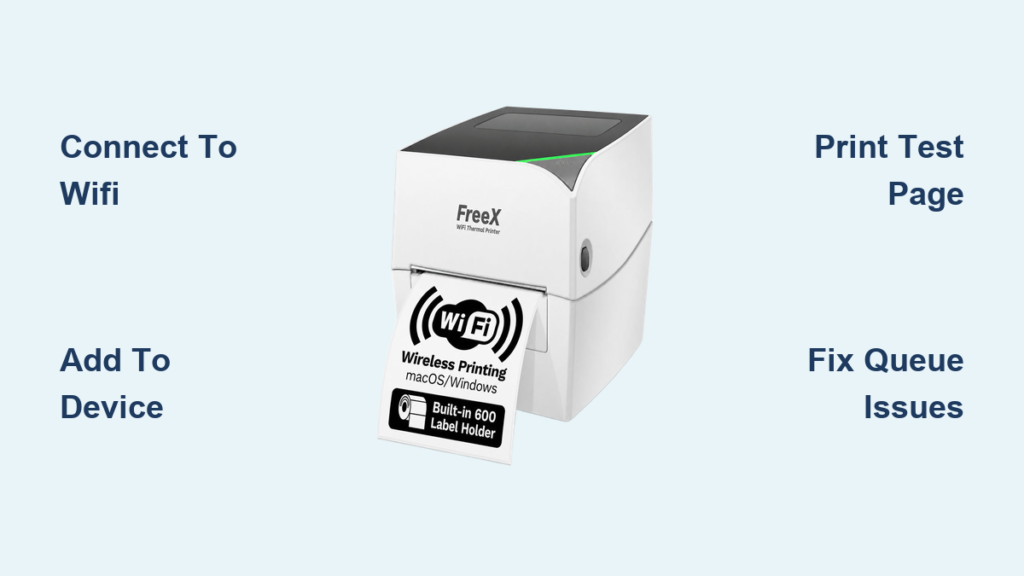
You’ve finally unboxed your new wireless printer or want to cut the cord on an older model sitting next to your desk. The cables are tangled, the manual is confusing, and now you’re stuck wondering how to actually start printing. You’re not alone. Millions of people switch to wireless printing every year for cleaner workspaces and flexible device access.
This guide breaks down everything you need to know about how to print from a WiFi printer. You’ll learn how to set up the connection, add the printer to your devices, and troubleshoot common issues. Whether you’re on Windows, Mac, Android, or iOS, we’ve got you covered with clear steps and practical tips.
Connect Your Printer to a WiFi Network
Before you can print wirelessly, your printer needs to join the same WiFi network as your computer or phone. The connection method depends on your printer’s features.
Use the Built-in Display for Quick Setup
If your printer has a touchscreen or control panel, you can connect it directly without needing a computer.
- Press Settings on the printer’s menu
- Navigate to Network Settings then Wi-Fi Setup
- Select Wi-Fi Setup Wizard
- Choose your home WiFi network from the list
- Enter your WiFi password using the on-screen keyboard
Wait for the printer to restart. A solid WiFi light means you’re connected.
Pro Tip: Print a network configuration page from your printer’s menu to verify the IP address and confirm the connection works.
Connect Printers Without a Display Using USB
Older or budget printers often lack a screen. In this case, use a USB cable and computer to configure the WiFi settings.
For Windows:
1. Connect the printer to your computer via USB
2. Download the manufacturer’s software from their official website
3. Run the setup wizard and follow the prompts to connect to WiFi
4. Unplug the USB cable once setup is complete
For Mac:
1. Connect the printer to your Mac using USB
2. Install the Mac software that came with your printer
3. Open the printer setup assistant
4. Follow prompts to connect the printer to your WiFi network
5. Disconnect the USB cable
Warning: Don’t skip the software installation. It includes essential drivers and network tools your computer needs to communicate with the printer.
Set Up via Ad-Hoc Network on Mac
Certain printers create a temporary network for initial setup. This method works on Mac computers.
- Make sure the printer’s ad-hoc network is turned on (check your manual)
- On your Mac, click the WiFi icon in the menu bar
- Select the printer’s ad-hoc network from the list
- Open the printer setup assistant installed with your driver
- Use it to connect the printer to your home WiFi
- Switch your Mac back to your regular network
Note: While connected to the printer’s ad-hoc network, your Mac won’t have internet access. This is temporary and normal during setup.
Connect Using WPS for Fast Setup
If your router and printer both support WPS (WiFi Protected Setup), you can connect without entering a password.
- Press the WPS button on your router
- Within two minutes, press WPS on your printer or select it in the menu
- Wait for the devices to pair automatically
A steady light on your printer indicates a successful connection.
Verify First: Not all printers or routers support WPS. Check your device documentation before trying this method.
Convert a USB Printer to WiFi Using Your Router
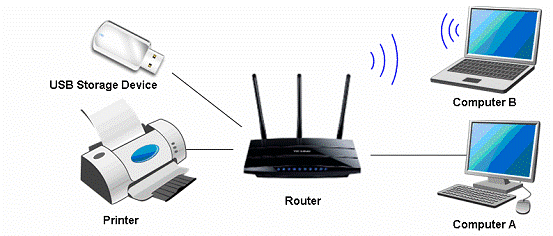
Don’t replace your old printer. If your router has a USB port and supports print servers, you can make any USB printer wireless.
Check Router Compatibility
Not every router supports USB printing. Here’s how to check:
- Look for a USB port on the back of your router
- Log in to your router’s admin panel (usually
192.168.1.1) - Navigate to USB Settings then Print Server
- Enable the print server if it shows “Offline”
Most TP-Link, ASUS, and select Netgear routers support this feature.
Install the Required Software
You’ll need a utility to manage the printer over your network.
- Visit your router manufacturer’s website
- Search for your router model (include hardware version if applicable)
- Download the USB Print Controller utility
- Install it on a Windows computer connected to the same network
This software lets your computer find and connect to the printer through the router.
Connect the Printer and Test
Now plug everything in and verify the connection.
- Connect the USB printer to your router’s USB port
- Power on the printer
- Open the USB Print Controller app on your computer
- Click Auto Connect for Printing
- Send a test print to confirm everything works
Once successful, other computers and mobile devices on the network can print too.
Key Requirement: The printer must stay powered on. The router handles print jobs, so you don’t need a computer running all the time.
Add a WiFi Printer to Windows
After your printer joins the network, Windows must recognize it.
Use Settings in Windows 10 or 11
- Click Start then Settings (gear icon)
- Go to Bluetooth & devices
- Select Printers & scanners
- Click Add a printer or scanner
- Wait while Windows searches for available printers
- Select your printer from the list and click Add device
A status of Ready means you’re good to go.
Add the Printer Manually If Not Detected
Sometimes Windows can’t find the printer automatically. Try manual setup.
- Click The printer that I want isn’t listed
- Choose Add a local printer or network printer with manual settings
- Select Create a new port then Standard TCP/IP Port
- Enter the printer’s IP address (found on the network report)
- Install the correct driver when prompted
Where to Find the IP Address: Print a network configuration page from your printer’s menu, or check your router’s connected devices list.
Print from Windows Devices
Now that everything’s set up, sending a print job takes just seconds.
Send Any Document to Your Printer
- Open the file you want to print (PDF, Word, image, etc.)
- Press Ctrl + P or go to File > Print
- Select your WiFi printer from the list
- Click Print
Avoid options like Microsoft XPS Document Writer or Fax. These aren’t real printers.
Confirm the Print Worked
After clicking print, verify success by checking:
- Listen for the printer starting up
- Check the paper tray for your document
- Look for any error lights (paper jam, low ink)
If nothing happens, restart the printer and try again.
Pro Tip: Set your WiFi printer as the default printer in Windows settings to skip the selection step every time.
Print from Mac Using AirPrint
Apple makes wireless printing simple with AirPrint technology.
Confirm AirPrint Support
Most modern WiFi printers support AirPrint. To verify:
- Check the manufacturer’s website
- Look in the printer manual
- Search for the AirPrint logo on the original packaging
If supported, no driver installation is needed.
Print from Your Mac
- Open the document you want to print
- Press Cmd + P or go to File > Print
- Select your printer from the list
- Adjust settings like copies or page range
- Click Print
AirPrint handles everything automatically, including driver communication.
Print from iPhone or iPad
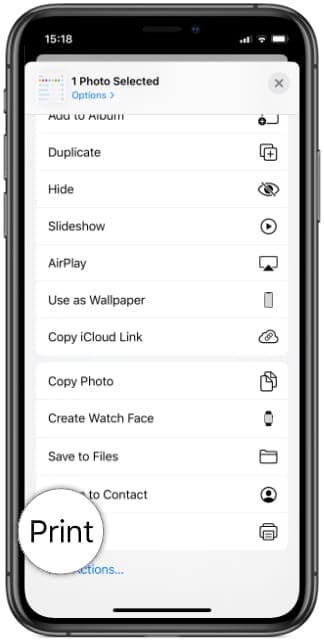
AirPrint works on iOS devices just as smoothly as on Mac.
Print from Your iPhone or iPad
- Open a web page, email, or photo
- Tap the Share icon (square with an arrow)
- Scroll down and tap Print
- Select your AirPrint-compatible printer
- Choose the number of copies and tap Print
No apps required. Your document prints immediately.
Quick Fix: If your printer doesn’t appear, make sure both devices are on the same WiFi network.
Print from Android Devices

Android lacks a built-in system like AirPrint, but third-party apps solve this easily.
Use the PrintShare App
- Install PrintShare from the Google Play Store
- Open the app and tap Select Printer
- Choose Nearby WiFi
- Select your printer (it will install the driver automatically)
- Print from any app (PDFs, emails, photos)
PrintShare supports most WiFi, USB, and network printers.
Use Manufacturer-Specific Apps
For the best experience, download your printer brand’s official app:
- HP Smart for HP printers
- Canon PRINT for Canon printers
- Epson Connect for Epson printers
- Brother iPrint&Scan for Brother printers
These apps enable remote printing, scanning, and ink level monitoring.
Remote Printing Bonus: With manufacturer apps, you can print even when away from home. Perfect for hybrid work or travel.
Troubleshoot Common WiFi Printing Problems
Even great setups occasionally hit snags. Here’s how to resolve them quickly.
Printer Not Detected on the Network
Try these fixes:
- Restart both the printer and your router
- Confirm both devices are on the same WiFi network
- Check that the printer’s WiFi light is solid (not blinking)
- Run the Add Printer wizard again
If the printer still won’t appear, print a network configuration page to verify its IP address.
Print Jobs Stuck in the Queue
Clear the print spooler to release stuck jobs.
- Open Settings then Bluetooth & devices
- Select Printers & scanners
- Click on your printer and choose Remove device
- Re-add the printer using Add a printer or scanner
- Try printing again
Advanced Fix: Restart the Print Spooler service in the Windows Services app if problems persist.
Poor Print Quality
Fix blurry or faded prints with these steps:
- Run Nozzle Check or Print Head Alignment from the printer menu
- Clean the print heads if needed
- Check ink or toner levels in the printer software
Replace cartridges if they’re low or clogged.
Driver Installation Fails
When Windows or Mac refuses to install drivers:
- Note your exact printer model (e.g., HP DeskJet 3760)
- Visit the manufacturer’s official website
- Download the latest driver for your operating system
- Run the installer as administrator
Security Tip: Avoid third-party driver sites. They often bundle malware or outdated software.
Router Print Server Not Working
If your USB-to-WiFi conversion fails:
- Confirm your router supports USB print server
- Ensure the USB Print Controller utility is installed
- Check that the printer is powered on and connected via USB
- Try a different USB cable (avoid hubs or extensions)
Restart the router if needed. Some routers require firmware updates to enable print server features.
Optimize Your Wireless Printing Setup
Keep your wireless printing fast, reliable, and secure with these best practices.
Keep All Devices on the Same Network
Every device (laptops, phones, tablets) must connect to the same WiFi network as your printer.
Guest Network Warning: Most printers can’t be accessed from guest networks due to security restrictions.
Assign a Static IP to Your Printer
Prevent connection drops by reserving a fixed IP address.
- Log in to your router’s admin panel
- Find the connected devices list
- Reserve an IP address for your printer’s MAC address
This stops the IP from changing after router reboots.
Update Printer Firmware Regularly
Manufacturers release updates that improve performance and security.
- Open the printer’s control panel or mobile app
- Look for Firmware Update in settings
- Follow the prompts to install
Updates can fix bugs and improve WiFi stability.
Secure Your Wireless Printer
Printers are network devices and need protection:
- Change the default admin password if available
- Disable unused features like remote admin access
- Keep your network firewall enabled
Security Risk: Unsecured printers can be exploited for data theft or network attacks.
Frequently Asked Questions About Printing from a WiFi Printer
Why won’t my computer find my WiFi printer?
Your computer and printer must be on the same WiFi network. Restart both devices, verify the printer’s WiFi light is solid, and check that your router isn’t isolating the devices. If problems persist, print a network configuration page to confirm the IP address.
Do I need to install software to print wirelessly?
Most modern printers work without extra software on Windows and Mac. AirPrint-enabled printers require no setup on Apple devices. However, printers without displays need manufacturer software for initial WiFi configuration.
Can I print from my phone without an app?
iPhones and iPads can print directly using AirPrint without extra apps. Android phones typically need a printing app like PrintShare or a manufacturer-specific app like HP Smart or Canon PRINT.
How do I find my printer’s IP address?
Print a network configuration page from your printer’s menu. You can also find it in your router’s connected devices list. The IP address appears alongside your printer’s name.
Why are my print jobs stuck in the queue?
Stuck jobs usually result from communication errors between your computer and printer. Remove the printer from your device list, re-add it, and try again. Restarting the Print Spooler service can also help.
Can I make an old USB printer wireless?
Yes, if your router has a USB port and supports print server functionality. Connect the printer to your router via USB, install the USB Print Controller utility, and the router will manage print jobs across your network.
Key Takeaways for Setting Up Wireless Printing
Learning how to print from a WiFi printer boils down to three essentials: connect the printer to your network, add it to your devices, and send your first print job. Whether you’re using a modern AirPrint-enabled device or converting an older USB printer through your router, the setup follows the same core principles.
Start by choosing the connection method that matches your printer’s features. If it has a display, use the built-in WiFi setup. If not, connect via USB or WPS. Once the printer joins your network, add it to Windows, Mac, or your mobile devices using the appropriate settings menu.
Your next step? Run through the final setup checklist below to confirm everything works before your first important print job:
- Printer powered on and connected to WiFi
- Solid WiFi indicator light
- Computer detects the printer in the device list
- Test page prints successfully
- Mobile devices can print
- Correct driver installed and updated
- Paper and ink levels sufficient
- No error messages on the printer display
Once all boxes are checked, you’re ready to enjoy cable-free printing from any room in your home or office.


