
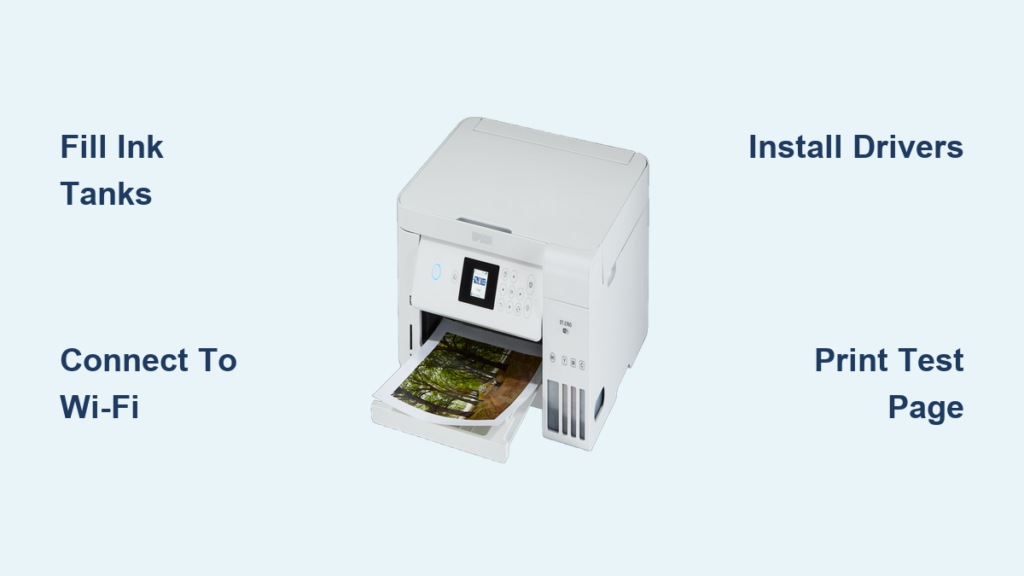
Setting up your Epson ET-2760 printer doesn’t have to feel overwhelming. This wireless all-in-one EcoTank printer uses refillable ink tanks instead of cartridges, giving you up to 7,500 black pages and 6,000 color pages per ink set. Whether you’re a first-time user or upgrading from an older model, this guide walks you through unboxing, ink filling, Wi-Fi setup, driver installation, and mobile printing in clear, manageable steps.
By the end, you’ll have a fully functional printer connected to your devices, ready to print, scan, and copy with confidence. Let’s walk through each stage of the Epson ET-2760 setup so you can start printing without delays or frustration.
Power On and Select Your Language
Boot Up the Printer
After unboxing your ET-2760, place it on a flat, stable surface near your router. Plug the power cord into a wall outlet and press the power button on the right side of the control panel. The touchscreen will light up and prompt you to choose a language.
Choose Your Preferred Language
Use the arrow keys on the control panel to scroll through the language options. Press OK to confirm your selection. The setup process will automatically advance to the ink installation phase once you’ve confirmed your language.
Pro Tip: Select your region’s default language to avoid confusion when navigating later menus or troubleshooting messages.
Fill the Ink Tanks the Right Way
Open the Ink Chamber
Lift the scanner unit until it locks into place to access the ink tank compartment. Open the protective covers over all four color tanks: black, cyan, magenta, and yellow. Each slot is color-coded to match the corresponding ink bottle.
Match Bottles to Correct Slots
Remove each Epson T502 ink bottle from its packaging and twist off the cap. Match each bottle to its color-coded slot. Press the bottle down gently until you hear a click—the bottle will automatically begin dispensing ink without squeezing.
Wait for Tanks to Fill
Let each tank fill completely, which takes about 1–2 minutes per color. Some ink may remain in the bottle when the tank is full, and this is normal. Don’t remove the bottle prematurely or force it into the wrong slot, as this can cause clogs or color mixing.
Confirm Ink Installation
Once all tanks are filled, close the protective caps and lower the scanner lid securely. Press and hold the Question Mark (Help) button for 3 seconds, then tap Start on the screen. Wait up to 10 minutes while the printer initializes the ink system.
Warning: Always use genuine Epson T502 ink bottles. Third-party inks may void your warranty and damage internal components.
Load Paper and Adjust Print Quality

Insert Paper into the Rear Tray
Pull out the rear paper feed and insert a stack of Letter or A4 paper. Adjust the paper width guides so they fit snugly against the paper edges without bending it. Confirm the paper size and type on the control panel, then tap OK.
Run the Print Quality Test
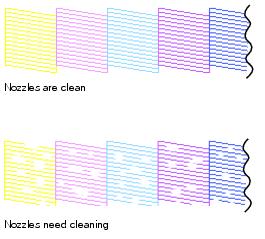
Navigate to Settings > Print Quality Adjustment > Print Test Page. The printer will output a nozzle check pattern. Examine the page for missing lines, streaks, or uneven colors. If the page looks clean, select No Missing Lines and tap OK.
Align the Print Heads
Select Print Position Adjustment to print the alignment sheet. This sheet contains numbered boxes with overlapping lines. Identify the box where the lines look cleanest, with no gaps or overlaps. Enter the best number for each test pattern and confirm. The printer will print a final alignment page to verify accuracy.
Expert Note: Always perform print head alignment after initial setup or ink refills to prevent blurry text and jagged images.
Connect the ET-2760 to Wi-Fi

Access the Wi-Fi Setup Wizard
Make sure your router is powered on and within range. On the printer’s touchscreen, press the Home button, use the left arrow to select Wi-Fi Setup, then tap OK. Choose Wi-Fi Recommended > Wi-Fi Setup Wizard. The printer will scan for available networks.
Enter Your Network Password
Select your network (SSID) from the list. Use the on-screen keyboard to enter your Wi-Fi password:
– Navigate with the right arrow
– Select characters using up/down arrows
– Toggle between uppercase, lowercase, and symbols using dedicated keys
– Press the left arrow to delete mistakes
– Tap OK when complete
Critical: Passwords are case-sensitive. Double-check capital letters and special characters before confirming.
Verify the Connection
The printer will attempt to connect to your network. A confirmation tone signals success. Press the Wi-Fi button on the front panel to print a Network Configuration Report, which displays your connected SSID, IP address, signal strength, and MAC address. Keep this report handy for future troubleshooting.
Shortcut: If the connection fails, restart both the printer and router before retrying.
Install Software on Windows or Mac

Download the Official Driver Package
Open your browser and search for “Epson ET-2760 support.” Go to the official Epson website and select your operating system. Download the Drivers and Utilities Combo Package Installer.
Note: Only use Epson’s official downloads—third-party driver sites can compromise functionality and security.
Run the Installer
Locate the downloaded file (usually in your Downloads folder) and double-click to launch it. If prompted by User Account Control, confirm the publisher is Epson and click Yes. During installation:
– Accept the End-User License Agreement
– Choose Wireless Connection when prompted
– Select Set Up Printer for the First Time
– Allow the installer to detect your printer automatically
If detection fails, choose Using Control Panel, note your network name and password, and complete Wi-Fi setup manually on the printer. Installation typically takes 5–10 minutes.
Set Up Mobile Printing on iOS and Android
Install the Epson iPrint App
On your iPhone or iPad, open the App Store and search for Epson iPrint. Download and install the app, then open it and tap Add Printer. The app will search for nearby Epson printers. When ET-2760 Series appears, tap it to connect.
Print and Scan from Your Phone
From the iPrint app, you can:
– Tap Print to send documents, photos, or web pages
– Tap Scan to digitize receipts, notes, or photos directly to your device
– Choose destinations like Email, Google Drive, or Dropbox
Best Practice: Make sure your phone and printer are connected to the same Wi-Fi network for seamless performance.
Add the Printer to Additional Devices
Connect Another Computer Wirelessly
On a second PC or Mac, download the same driver package from Epson’s site. Run the installer and select The Printer Is Already on My Wireless Network. Follow the prompts to complete the setup.
Add via Windows Settings
If you prefer not to reinstall drivers, go to Settings > Devices > Printers & Scanners, click Add a printer or scanner, and wait for Epson ET-2760 Series to appear. Click Add device. To enable scanning, go to Manage > Scanner > Open Scanner.
Troubleshoot Common Setup Issues
Printer Won’t Connect to Wi-Fi
Run through this quick checklist:
– Is the router powered on and broadcasting Wi-Fi?
– Is the printer within range of the router?
– Did you enter the correct password?
– Have you tried restarting both devices?
– Does the Network Configuration Report show a successful connection?
If the issue persists and your router supports WPS, press WPS on the router, then press and hold the Wi-Fi button on the printer for 3 seconds within 2 minutes.
Print Quality Looks Faded or Streaky
After an ink refill, perform a print head cleaning cycle:
1. Go to Settings > Maintenance > Clean Print Head
2. Run one cycle and print a Nozzle Check
3. Repeat up to three times if needed
Warning: Excessive cleaning wastes ink. Only run the cycle when print quality clearly suffers.
Maintain Optimal Long-Term Performance
Clean Print Heads Regularly
Run a cleaning cycle monthly if you print frequently. For infrequent users, print a test page every 2–3 weeks to prevent nozzle drying. Use Epson ScanSmart for advanced scanning features like batch scanning, OCR, and PDF creation.
Refill Ink Before Tanks Run Dry
Never let ink levels drop to zero—low ink can pull air into the system and cause print failures. Refill when tanks reach one-quarter full. Always use genuine Epson T502 bottles:
– Black: T502120
– Cyan: T502220
– Magenta: T502320
– Yellow: T502420
Frequently Asked Questions About Epson ET-2760 Setup
How Long Does It Take to Set Up the Epson ET-2760?
The full setup process takes about 30–45 minutes, including unboxing, ink filling (which alone takes around 10 minutes for initialization), Wi-Fi configuration, and driver installation.
Can I Set Up the ET-2760 Without a Computer?
Yes. You can complete the initial setup using only the printer’s touchscreen and your mobile device. Download the Epson iPrint app to handle wireless configuration and printing without a PC.
What Wi-Fi Frequency Does the ET-2760 Support?
The ET-2760 supports 2.4 GHz Wi-Fi networks. If you’re using a dual-band router, connect the printer to the 2.4 GHz band for best compatibility.
Why Are My Test Pages Showing Missing Lines?
Missing lines usually indicate clogged nozzles. Run a print head cleaning cycle from Settings > Maintenance and print another nozzle check. Repeat up to three times if needed.
Where Can I Download Epson ScanSmart?
You can download Epson ScanSmart from the official Epson support site under Software & Utilities. It provides advanced scanning features like OCR and batch processing.
Is the Epson ET-2760 Compatible with Chromebook?
Yes. The ET-2760 supports Chrome OS, allowing you to print directly from your Chromebook without installing additional drivers.
Final Takeaways for Your Epson ET-2760 Setup
You’ve now walked through every critical step to get your Epson ET-2760 printer up and running. The three most important things to remember are: fill ink tanks carefully and wait for full initialization, connect to a 2.4 GHz Wi-Fi network for stable performance, and always download drivers directly from Epson’s official site.
Your next step is to print a test page from your computer and phone to confirm everything works smoothly. If you encounter any issues, revisit the troubleshooting section or check the Network Configuration Report for connection details. With proper setup and occasional maintenance, your ET-2760 will deliver reliable, high-quality printing for years to come.


