Printer streaks can turn a clean document into a smudged, unprofessional mess in seconds. Whether you see white lines, dark vertical bands, or inconsistent color patches, learning how to fix printer streaks starts with identifying your specific printer type and the exact pattern on the page. Misdiagnosing the issue often leads to wasted ink, unnecessary part replacements, or even permanent damage to your machine.
This guide provides precise diagnostic steps and targeted fixes for inkjet, laser, and sublimation printers. You will learn how to distinguish between hardware failures and software glitches while following safe cleaning procedures. By the end of this article, you will know exactly how to restore crisp, streak-free prints without guessing or wasting more supplies.
Identify Streak Type and Pattern

Correct diagnosis is half the battle when repairing print quality issues. Different visual symptoms point directly to specific internal problems within your machine.
Analyze Visual Symptoms on Test Pages
Before touching any tools, print a test page using the built-in menu on your device. This step isolates hardware issues from software glitches effectively. Match what you see on the paper to these common symptoms:
- White lines or gaps: Likely clogged nozzles or dried ink in inkjet models.
- Vertical dark lines: Often indicates a scratched drum or toner leak in laser printers.
- Horizontal banding: Suggests printhead movement issues or partial nozzle blockage.
- Pink or color-specific streaks: Common in HP OfficeJet printers; may be a magenta channel blockage.
- Smudges or blurriness: Could mean wet ink transfer or fuser failure in laser units.
- Off-color fringes: Indicates print head misalignment in color inkjet systems.
If streaks appear only when printing from certain apps like Microsoft Word but not on the test page, the problem is likely software-related rather than mechanical.
Match Streaks to Printer Technology
Inkjet printers typically show consistent missing lines or faint colors due to dried ink on nozzles. This issue worsens significantly with infrequent use.
Laser printers produce vertical streaks or repeating marks caused by drum damage or dirty rollers. These problems are mechanical and not related to liquid ink flow.
Sublimation printers may show black streaks if heat press settings are incorrect or if you use the wrong paper type. Knowing your specific printer technology narrows the repair path significantly.
Clean Inkjet Print Heads and Nozzles

For inkjet owners, clogged nozzles are the number one cause of streaks. Start with automated cleaning methods before attempting manual repairs.
Run Automated Head Cleaning Cycles
Most printers include a built-in cleaning function accessible through the device menu.
- Go to Settings then Maintenance on the printer LCD screen.
- Select Clean Print Head from the options list.
- Wait for the cycle to complete, which usually takes 30 to 60 seconds.
- Print a nozzle check pattern to verify improvement.
Repeat this process up to three times if streaks persist. Avoid running more cycles than this because excessive cleaning wastes ink and can flood the internal system.
Pro Tip: Use the HP Smart App for HP printers by tapping Print Head Cleaning under Print Quality then Tools. Enter the PIN if prompted.
Perform Manual Nozzle Cleaning Safely
If automated cleaning fails to clear the blockage, you may need to clean the nozzles manually.
- Power off the printer and open the cartridge access door carefully.
- Remove ink cartridges one by one to avoid mixing colors.
- Dampen a lint-free cloth with distilled water only, never tap water.
- Gently wipe the nozzle plate on the bottom of the cartridge.
- Place the cartridge nozzle-down on a damp paper towel for five minutes to loosen dried ink.
- Use a cotton swab with distilled water to clean the carriage contacts inside the printer.
- Reinstall cartridges and run another cleaning cycle immediately.
Warning: Never touch electrical contacts with bare fingers. Let all parts dry completely before reassembly.
Align Cartridges After Cleaning
Misaligned heads cause color fringing or blurry text even after cleaning.
- Access Cartridge Alignment in the maintenance menu.
- Print the alignment sheet provided by the system.
- If your printer has a scanner, place the sheet face-down on the glass and tap Scan.
- If no scanner exists, follow on-screen prompts to select the clearest pattern manually.
Wait for the confirmation message before attempting to print your final document.
Fix Laser Printer Streaks and Drum Issues

Laser printers use toner and heat to create images. Streaks in these machines usually stem from the drum or fuser unit rather than clogged nozzles.
Inspect and Clean the Drum Unit
- Turn off and unplug the printer. Wait ten minutes for it to cool down.
- Open the front cover and remove the toner cartridge and drum unit.
- Rotate the drum slowly under bright light to inspect the surface.
- Look for scratches, toner buildup, dark spots, or lines on the cylinder.
Critical: Do not touch the green or blue photosensitive drum surface. Skin oils cause permanent damage.
- Use a dry, lint-free cloth or compressed air to remove loose toner particles.
- Reinstall the unit firmly until it clicks into place.
If the drum is scratched, you must replace it because cleaning will not fix physical damage.
Clean Paper Feed Rollers
Dirty rollers cause smearing and misfeeds that look like streaks on the page.
- Dampen a lint-free cloth with water or isopropyl alcohol.
- Wipe each roller gently while rotating it by hand to clean the whole surface.
- Let rollers air dry completely before closing the printer cover.
- Run a test print to check for improvement.
Replace rollers if they appear glazed, cracked, or worn, which is common after printing 50,000 pages.
Replace the Fuser Unit
If you see repeating smudges or toner rubs off the page easily, the fuser is failing. The fuser bonds toner using heat and pressure. Toner buildup or scorch marks prevent even bonding across the page.
Fusers cannot be cleaned safely and must be replaced when defective.
Cost Note: Fuser units are expensive, often costing between $80 and $150. If replacement exceeds 50% of a new printer’s cost, consider upgrading your machine.
Address Software and Driver Problems
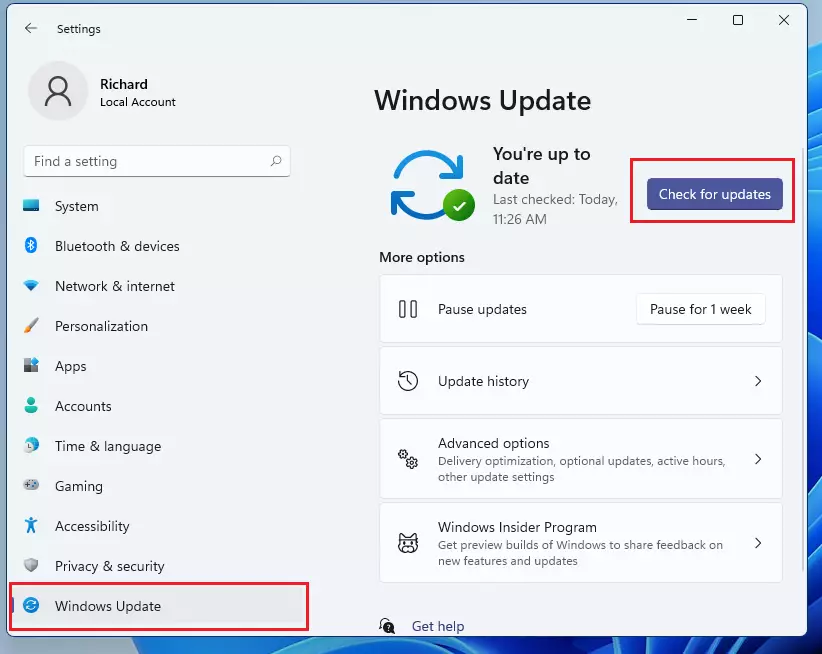
If test pages print perfectly but documents from Word or browsers have streaks, the issue is software-based.
Isolate the Faulty Application
- Print the same file from Adobe Reader, Microsoft Word, and a web browser.
- If only one app has streaks, the problem lies within that software.
Try saving the file as a PDF or PNG and printing the image version. This bypasses rendering errors within the original application.
Update or Reinstall Printer Drivers
Outdated or corrupted drivers cause miscommunication between your computer and printer.
- Go to the manufacturer’s official website such as HP, Canon, or Brother.
- Enter your printer model and operating system details.
- Download and install the latest driver available.
- Uninstall the old printer software first if problems persist.
- Restart your computer and reinstall the new driver.
Avoid Windows Update drivers as they are often outdated or generic versions.
Reset Printer to Factory Settings
As a last resort, reset the device to clear corrupted settings.
- Access Settings then General then Restore Defaults.
- Or hold Power + Cancel for ten seconds depending on your model.
- Reconnect Wi-Fi and re-add the printer to your computer.
This clears corrupted settings but erases custom profiles and network configurations.
Troubleshoot Sublimation Printer Streaks
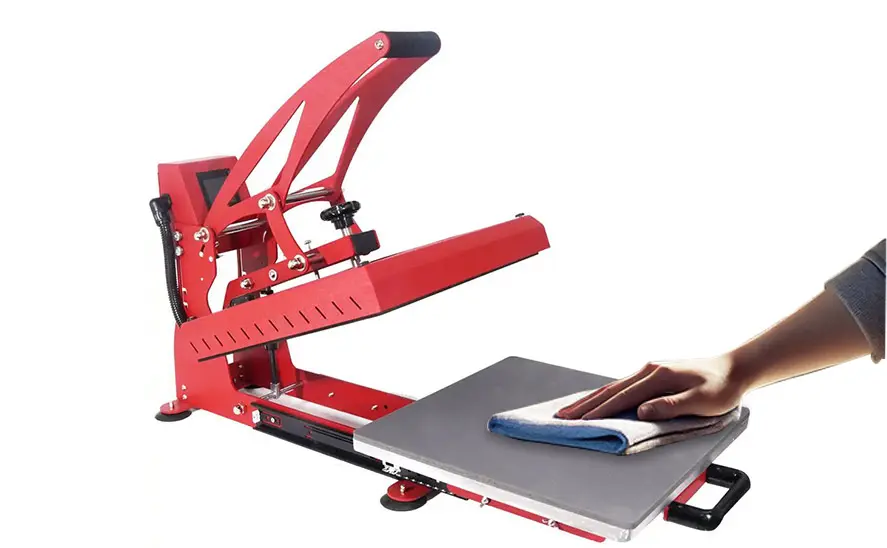
Sublimation printers transfer ink via heat. Black streaks usually stem from process errors rather than hardware failure.
Verify Transfer Paper and Settings
- Use only sublimation-specific transfer paper because regular paper causes bleeding.
- Check heat press settings for accuracy.
- Temperature: 400°F (204°C)
- Time: 40 to 60 seconds
- Pressure: Medium and even across the platen
- Pre-press paper for five seconds to remove moisture if needed.
Clean the Heat Press Platen
Dust or residue on the platen causes uneven transfer and streaking.
- Let the press cool completely before cleaning.
- Wipe the surface with a microfiber cloth and isopropyl alcohol.
- Ensure no wrinkles or creases exist in the transfer paper before pressing.
Test Before Final Print
Always run a sample on scrap fabric first. Adjust time or pressure if streaks appear on the test piece.
Prevent Streaks with Regular Maintenance
Prevention is faster and cheaper than repair. Follow this schedule to maintain print quality.
| Frequency | Task | Purpose |
|---|---|---|
| Every use | Check paper for dust/moisture | Prevents feed issues |
| Monthly | Run automated head cleaning (inkjet) | Prevents nozzle clogs |
| Monthly | Wipe interior with dry cloth | Removes dust and debris |
| Every 3–6 months | Clean rollers manually | Avoids smearing |
| As needed | Replace drums/fusers | Maintains print quality |
| After idle periods | Print test page + cleaning cycle | Rehydrates inkjets |
Optimize Environment and Supplies
- Store paper in a dry, sealed container because moisture causes streaks.
- Keep printer in a low-dust area since dust clogs rollers and drums.
- Use genuine or high-quality compatible cartridges because cheap ink dries faster.
Holiday Letter Tip: Printers used only once a year often streak. Run a cleaning cycle before your big print job.
When to Replace Parts or the Printer
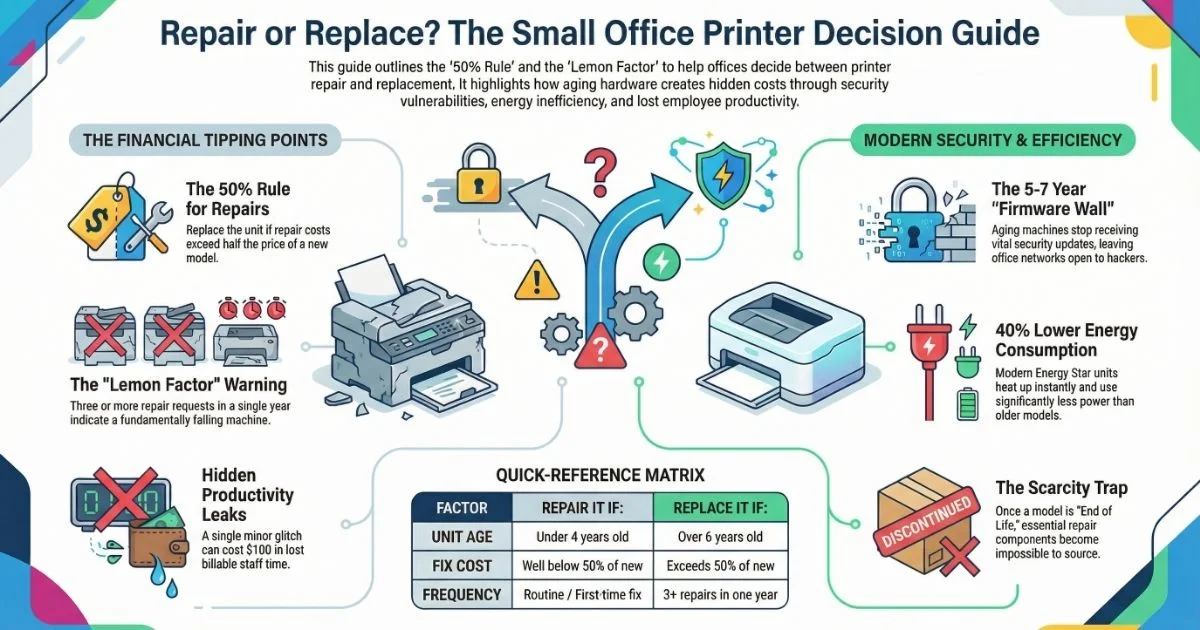
Not all streaks can be fixed with cleaning alone. Know when to upgrade your equipment.
Replace These Components
- Ink cartridges: If low or expired.
- Drum units: Every 10,000 to 20,000 pages or if scratched.
- Fuser units: When toner rubs off or smudges repeat every few inches.
- Rollers: If paper slips or jams frequently.
Consider a New Printer If
- Repair costs exceed 50 to 60% of a new model price.
- Streaks persist after replacing all consumables.
- The printer makes grinding or clicking noises indicating mechanical failure.
Warranty Note: Using non-genuine cleaners or opening sealed units may void your warranty.
Frequently Asked Questions About Printer Streaks
Why does my printer print streaks only on color documents?
Color-specific streaks often indicate a blocked nozzle in one color channel or a driver rendering issue. Run a nozzle check pattern to see which color is missing. If only one app shows the issue, try printing as a PDF to bypass software errors.
Can I use tap water to clean my printhead?
No, you should never use tap water because minerals can clog nozzles further. Always use distilled water or specific printhead cleaning solutions. Tap water leaves deposits that worsen the blockage over time.
How do I know if my laser printer drum is damaged?
Inspect the green or blue cylinder under bright light for scratches or dark spots. If you see repeating vertical lines on every page matching a spot on the drum, the unit is damaged and requires replacement.
Why do my prints have horizontal bands instead of vertical lines?
Horizontal banding usually indicates a printhead movement issue or partial nozzle blockage in inkjet printers. Run the automated head cleaning cycle up to three times to clear the obstruction.
Is it worth fixing an old printer with persistent streaks?
If cleaning and replacing consumables like drums or fusers exceeds 50% of a new printer’s cost, upgrading is more economical. Persistent streaks after these steps often signal major mechanical failure.
Key Takeaways for Fixing Printer Streaks
Fixing printer streaks requires identifying the specific pattern and matching it to your printer technology. Inkjet users should focus on cleaning clogged nozzles while laser owners must inspect drums and fusers for damage. Regular maintenance and using quality supplies prevent most issues before they start.
Start by printing a test page to rule out software problems. Then follow the specific cleaning steps for your device type to restore print quality. If streaks persist after replacing key components, consider upgrading your printer to save money on costly repairs.