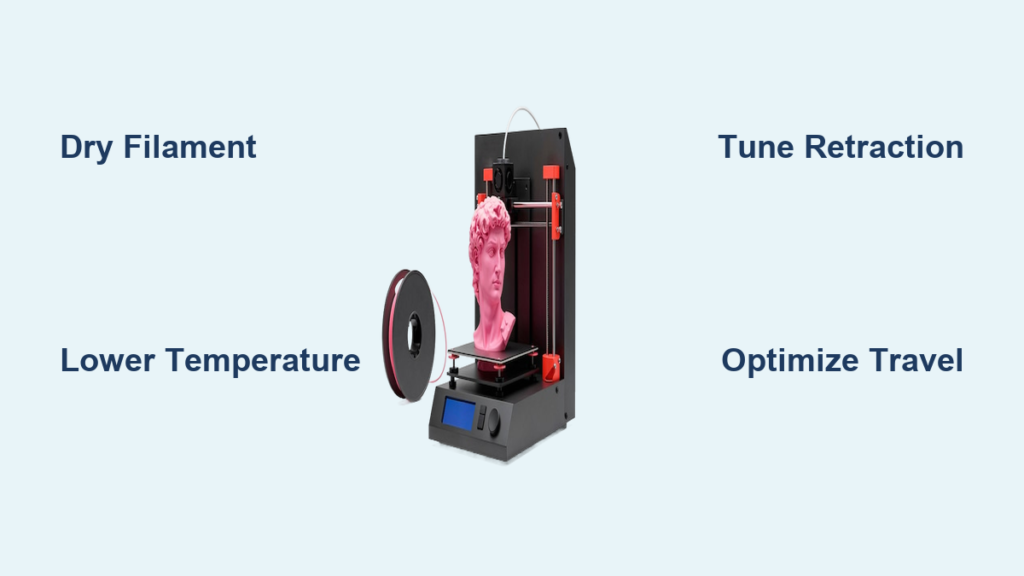
You are halfway through a print when thin plastic threads suddenly appear between parts like spiderwebs. This defect is 3D printer stringing, and it ruins otherwise perfect models by leaving behind unsightly strands of molten filament.
This guide shows you how to eliminate 3D printer stringing by tuning retraction, lowering temperatures, and drying wet filament. You will learn specific settings for PLA and PETG to turn hairy prints into clean, professional results.
Optimize Retraction Settings to Stop Oozing
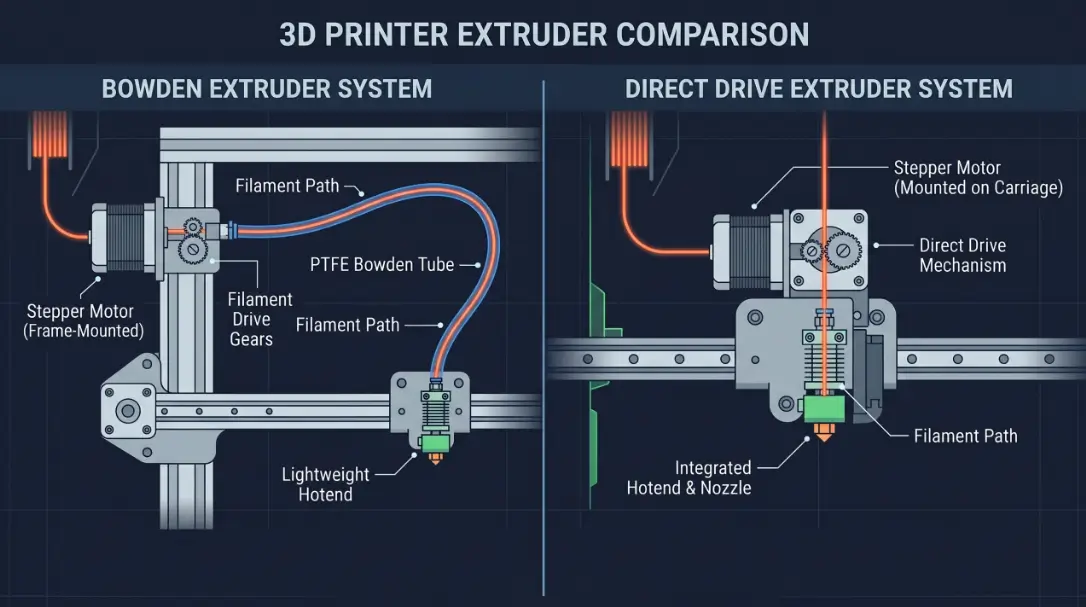
Retraction pulls filament back into the hotend during travel moves to prevent leaks. Incorrect distance or speed settings often cause 3D printer stringing because they fail to relieve internal pressure or cause under-extrusion.
Set Correct Retraction Distance
The ideal distance depends entirely on your extruder type and tube length.
* Direct-drive printers: Use 0.5–2.0 mm due to the short path to the nozzle.
* Bowden printers: Require 2.0–15.0 mm because of the long PTFE tube.
* Starting point: Try 3.0–3.8 mm for Bowden systems like the Prusa Mini.
Adjust in 1.0 mm increments during testing. Too little distance allows oozing, while too much causes grinding or clogs.
Tune Retraction Speed
Speed determines how quickly the filament withdraws from the melt zone.
* Optimal range: 20–100 mm/s (1200–6000 mm/min).
* Bowden recommendation: Start at 35–45 mm/s.
* Warning: Speeds that are too fast cause the drive gear to grind the filament.
If you hear clicking, the filament is slipping. Lower the speed or check your idler tension immediately.
Enable Layer Change Retraction
Many users miss strings that form when the printer finishes one layer and jumps to the next. Enable “Retraction on Layer Change” in your slicer software. This single setting often eliminates blobs and oozing artifacts at the start of new layers.
Lower Nozzle Temperature to Reduce Viscosity
High temperatures make filament too runny, causing it to leak during travel moves. If retraction tweaks fail, your nozzle temperature is likely too high for the material.
Reduce Temp by 5–10°C
Lowering the temperature increases viscosity and reduces unwanted flow.
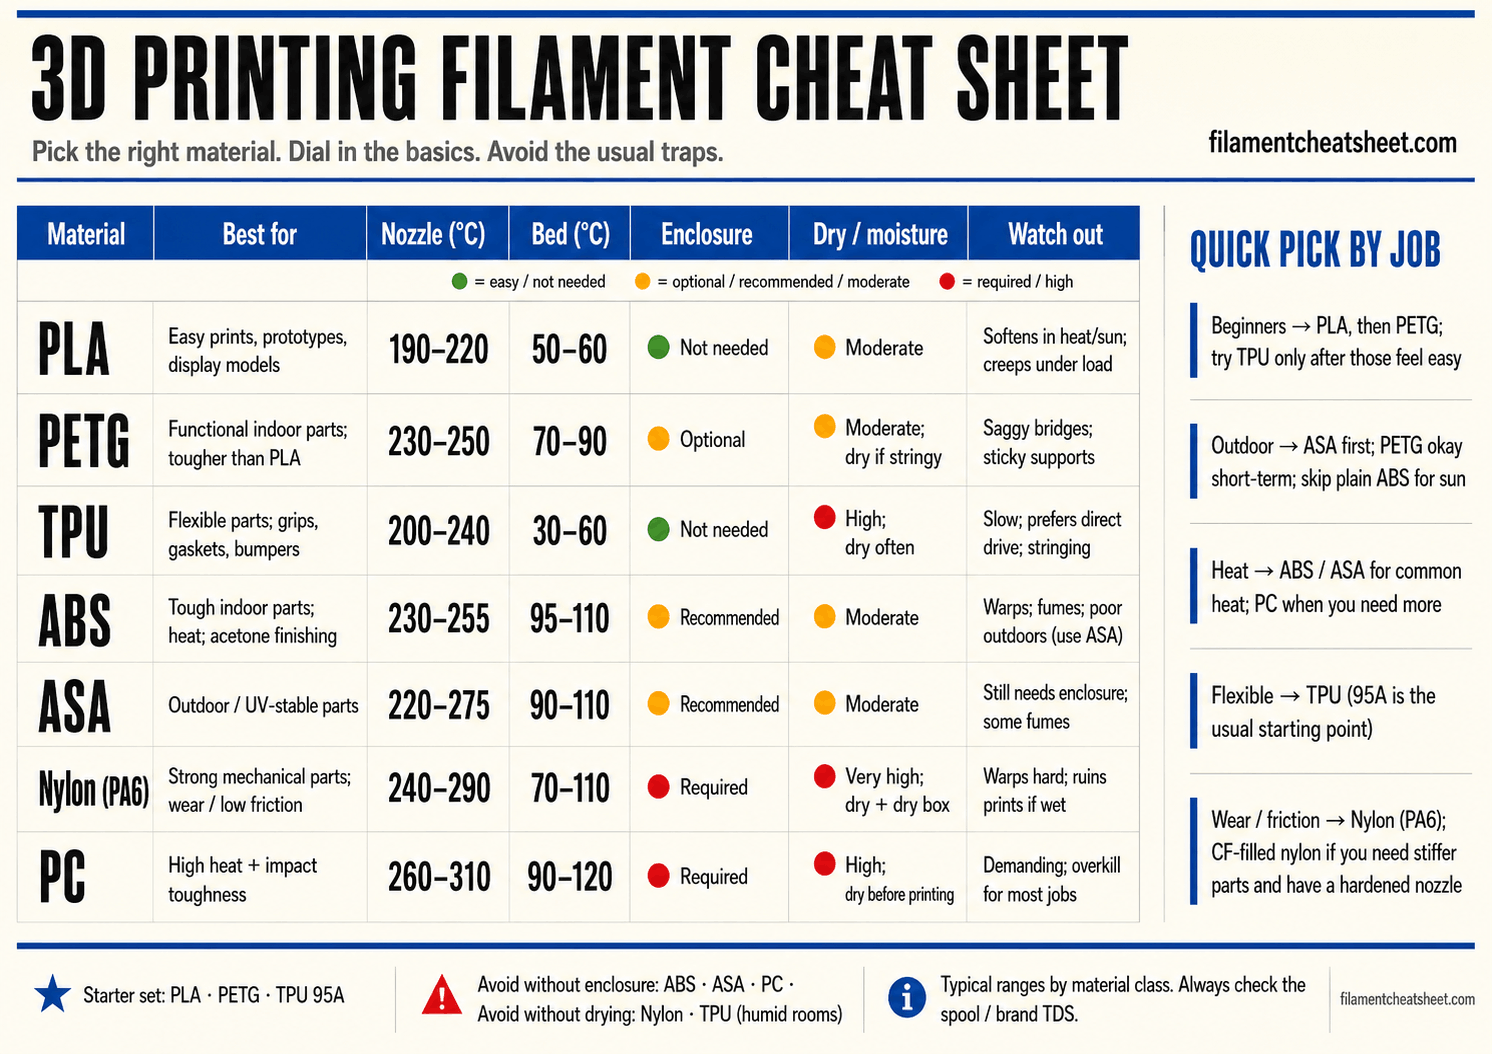
* PLA: Drop from 210°C to 200–205°C.
* PETG: Reduce from 250°C to 225–240°C.
* PVB: Cut from 215°C to 205°C.
One user fixed severe PETG oozing by dropping the temp to 225°C. Another eliminated PLA stringing at 200°C.
Balance Flow and Temperature
High flow rates combined with high heat increase back-pressure. Ensure your flow ratio is set to 1.0 unless you have calibrated otherwise. Correcting flow from 0.95 to 1.0 can resolve first-layer inconsistencies and reduce pressure buildup that leads to 3D printer stringing.
Dry Your Filament to Eliminate Moisture
Moisture is a silent killer of print quality. Hygroscopic materials like PLA, PETG, and Nylon absorb water from the air, which turns to steam in the hotend.
Test for Wet Filament
Perform the “pop test” to verify moisture levels.
1. Heat the nozzle to your printing temperature.
2. Lower the Z-axis by 20–30 mm.
3. Extrude 2–4 mm of filament slowly.
Listen for popping sounds or look for sputtering. Smooth extrusion means the filament is dry. Popping confirms moisture is causing your 3D printer stringing.
Dry Filament Properly
Use a dedicated filament dryer or food dehydrator for best results.
* PVB: Dry at 55°C for 6 hours.
* PLA/PETG: Use 40–55°C for 4–6 hours.
* Storage: Keep spools in sealed bins with desiccant.
Never exceed the glass transition temperature of your filament, or it will melt and ruin the roll.
Optimize Travel Movement Settings
The longer your nozzle travels through open air, the more time it has to ooze. Optimizing motion settings minimizes this exposure window.
Increase Travel Speed
Faster travel leaves less time for plastic to drip from the nozzle.
* Target speed: 150–200 mm/s for X/Y movements.
* Caution: Stay within your printer’s mechanical limits to avoid ringing.
Unlike print speed, travel speed only affects non-printing moves, making it a safe setting to increase.
Avoid Crossing Open Areas
Enable “Avoid crossing outline for travel movement” in your slicer. This routes the nozzle over solid printed parts instead of flying across gaps. It hides any minor oozing that does occur and prevents strings from forming in visible areas.
Use Z-Hop to Prevent Dragging
Z-hop lifts the nozzle vertically during travel to avoid scraping existing strings.
* Settings: Try 0.6 mm for small lifts or 1.4 mm for taller features.
* Note: This prevents dragging but does not stop the root cause of oozing.
Use Z-hop only after fixing retraction and temperature issues.
Check Mechanical Components for Errors
Perfect software settings cannot fix broken hardware. Inspect these mechanical parts if 3D printer stringing persists.
Adjust Idler Tension
The extruder must grip the filament tightly to retract effectively.
* Action: Tighten the idler screw by ½ turn.
* Test: Print a test cube and increase tension incrementally.
* Stop: If you hear grinding, you have gone too far.
Loose idlers cause slippage, rendering your retraction distance settings useless.
Inspect Nozzle and Hotend
- Nozzle size: A 0.6 mm nozzle flows more material than a 0.4 mm nozzle and may need different settings.
- Clogs: Partial blockages cause inconsistent pressure and random oozing.
- Assembly: Ensure the hotend is assembled correctly to prevent jams and leaks.
Replace worn nozzles immediately if you see persistent under-extrusion.
Apply Material-Specific Fixes

Different filaments require unique approaches to stop 3D printer stringing.
PLA: Cool Fast and Keep Dry
- Ensure part cooling fans run at 100% after the second layer.
- Print multiple objects to increase cooling time between layers.
- Use high-quality branded filament, as generic brands often contain more moisture.
PETG: Tight Control Needed
PETG is notorious for oozing and requires precise management.
* Keep temperatures between 225–240°C.
* Use moderate retraction (2.0–4.0 mm) at 30–40 mm/s.
* Dry thoroughly before every print.
PVB and Specialty Filaments
PVB is extremely sensitive to moisture and temperature deviations.
* Dry at 55°C for 6 hours strictly.
* Use low temperatures around 205°C.
* Calibrate retraction precisely, as slight errors cause immediate failure.
Follow a Step-by-Step Diagnostic Plan
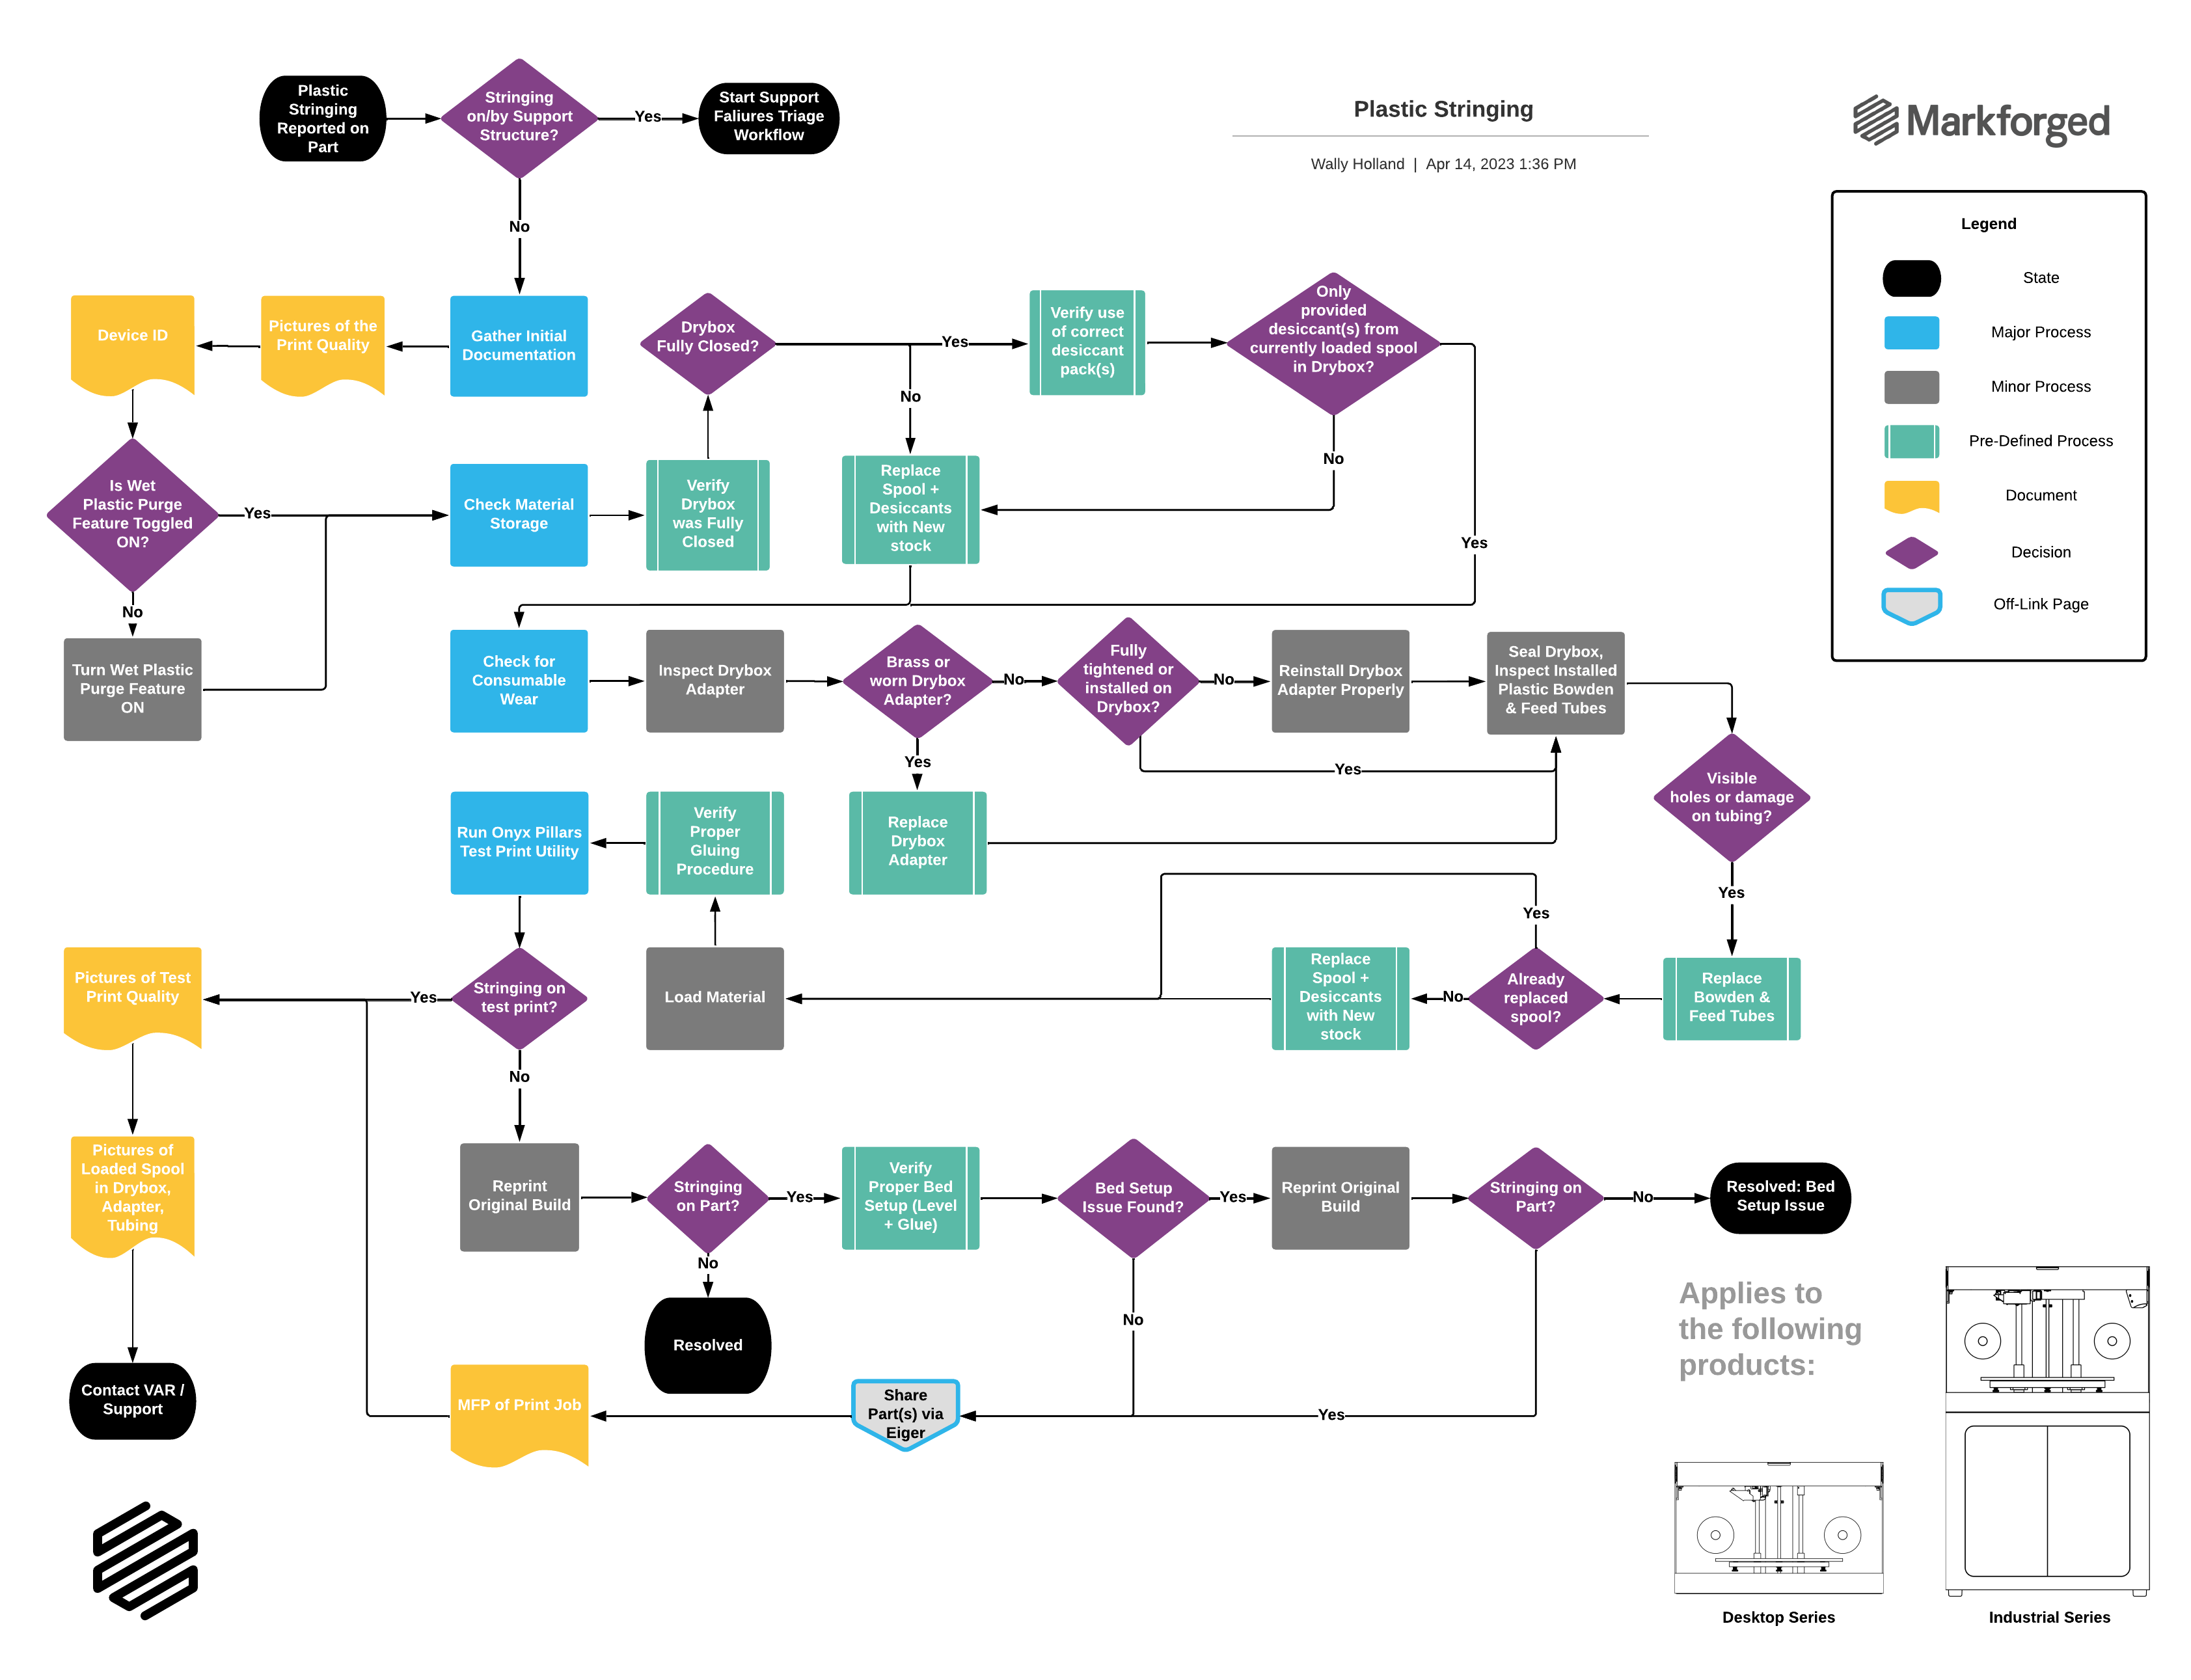
Use this workflow to isolate the cause of 3D printer stringing systematically.
1. Verify Filament Dryness
Perform the pop test. If wet, dry the filament for 4–6 hours or switch to a known-dry roll. Many users fix their issues at this step.
2. Lower Nozzle Temperature
Reduce temp by 5–10°C and print a test. Continue lowering until layer adhesion suffers, then raise slightly.
3. Tune Retraction Distance and Speed
- Bowden: Start at 3.0 mm distance and 40 mm/s speed.
- Direct-drive: Start at 1.0 mm distance and 30 mm/s speed.
- Adjust in small increments until strings disappear.
4. Check Hardware and Motion
Tighten the idler, clean the nozzle, and increase travel speed. Enable “avoid crossing outline” in your slicer.
5. Test Flow and Power
Set flow ratio to 1.0. If issues persist, check for power supply instability or voltage drops.
Slicer-Specific Tips for Stringing
Different software offers unique tools to combat 3D printer stringing.
Simplify3D
- Use “Coasting” to stop extrusion early and use residual pressure.
- Enable “Wipe” to clean the nozzle tip on printed parts.
PrusaSlicer
- Enable Linear Advance to improve pressure management.
- Rely on retraction and travel optimization since coasting is limited.
Bambu Studio
- Use Setting Overrides for quick Z-hop and retraction adjustments.
- Leverage native drying cycles before starting prints.
Frequently Asked Questions About 3D Printer Stringing
Why does my PLA print have thin threads between parts?
Thin threads indicate 3D printer stringing caused by molten plastic leaking during travel moves. This usually happens because the nozzle temperature is too high, the filament is wet, or retraction settings are too low for your specific setup.
What is the best retraction distance for Bowden printers?
Bowden printers typically require a retraction distance between 2.0 mm and 15.0 mm. Start with 3.0–3.8 mm and increase by 1.0 mm increments until stringing stops without causing under-extrusion or grinding.
How do I know if my filament is too wet to print?
Perform a pop test by extruding filament into the air. If you hear popping sounds or see sputtering, the moisture inside is turning to steam. This causes 3D printer stringing and requires immediate drying at 40–55°C.
Does lowering temperature always fix stringing issues?
Lowering temperature helps by increasing filament viscosity, but it is not a universal fix. You must also ensure retraction is enabled and the filament is dry. Going too low can cause poor layer adhesion and weak prints.
Why does my printer string even with correct retraction settings?
If retraction is correct, check mechanical factors like loose idler tension or a clogged nozzle. Wet filament and high travel times over open spaces are also common causes that settings alone cannot fix.
Can Z-hop stop stringing completely?
Z-hop lifts the nozzle to prevent dragging across existing strings, but it does not stop the oozing itself. You must fix the root cause, such as temperature or moisture, to stop 3D printer stringing from forming.
Key Takeaways for Fixing 3D Printer Stringing
Eliminating 3D printer stringing requires a systematic approach starting with dry filament and optimal temperature. Most users solve the issue by drying their spool, lowering the nozzle temp by 5–10°C, and tuning retraction distance in 1mm increments.
Mechanical checks like tightening idler tension and optimizing travel speed provide the final polish for clean prints. Start with the pop test today to rule out moisture, then adjust your slicer settings to achieve professional, string-free results.