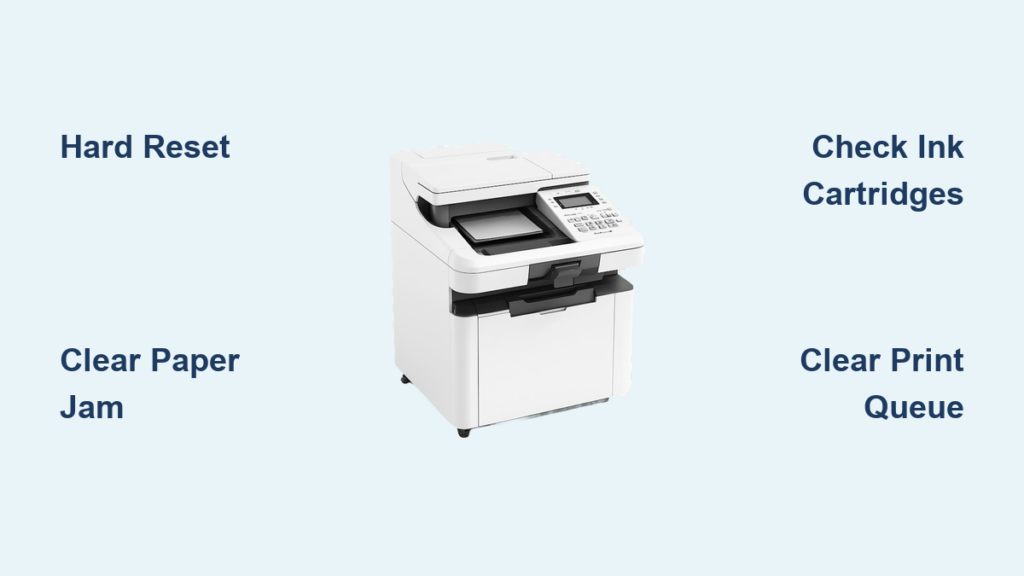
You click print, hear the machine whir, but your Epson printer outputs nothing but blank pages. It is a maddening scenario that happens to thousands of users daily, often right when you need a document most.
This guide solves that exact problem by walking you through proven fixes for clogged heads, driver glitches, and connection errors. You will learn how to diagnose hardware states, clear stuck queues, and run deep cleaning cycles to restore full function without calling support.
Verify Power Status and Clear Paper Jams
Many printing failures stem from simple physical oversights rather than complex technical faults. Before touching software settings, you must ensure the hardware is ready to receive commands and move paper correctly.
Check Power Connections and Light Indicators
Your printer needs stable electricity to engage its internal pumps and heaters. A dim light or flickering power button often signals a loose cable or a failing power strip. Plug the device directly into a wall outlet to rule out power supply issues.
Look closely at the LED status lights. Epson uses specific flash patterns to tell you what is wrong. Alternating orange and green flashes usually mean a print head error, while rapid orange blinking often points to a paper feed problem.
Remove Obstructions from Paper Path
A single piece of torn paper can halt the entire mechanism. Open all accessible panels, including the rear duplexer if your model has one. Look for small scraps, staples, or foreign objects blocking the rollers.
Gently pull any jammed paper in the direction of normal travel. Never yank paper backward, as this can damage the delicate internal sensors. Once cleared, close all covers firmly until they click into place.
Reseat Ink Cartridges to Restore Flow
Even if your software says ink is full, a loose cartridge prevents flow. This is a frequent cause of blank pages that users often miss during initial troubleshooting.
Remove and Reinstall Cartridge Units
Open the printer cover and wait for the carriage to center itself. Press down on each cartridge to release it, then lift it out carefully. Inspect the copper contacts for dried ink or debris that might block communication.
Push each cartridge back into its slot with firm, even pressure. You must hear a distinct click for the valve to open and the circuit to complete. A cartridge that feels slightly loose will not allow ink to reach the printhead.
Dislodge Air Bubbles by Shaking
Air bubbles trapped in the tubing or cartridge can stop ink from reaching the nozzles. This often happens after replacing cartridges or moving the printer recently.
Remove the suspect cartridge and hold it upright. Gently shake it side to side to redistribute the liquid and move any air pockets away from the outlet. Reinstall the cartridge immediately and run a cleaning cycle to pull ink through the system.
Run Nozzle Check to Diagnose Clogs

Do not guess at the problem. A nozzle check prints a test pattern that reveals exactly which color channels are blocked or functioning normally.
Print the Test Pattern
Access the maintenance menu on your printer control panel. Navigate to Setup or Maintenance, then select Nozzle Check. The printer will eject a page with horizontal lines for black and each color.
Examine the pattern closely. Solid, unbroken lines mean your hardware is fine, and the issue is likely software. Gaps, streaks, or missing sections indicate dried ink clogging the microscopic nozzles.
Interpret Missing Lines Correctly
If you see gaps in the test pattern, your printhead nozzles are partially blocked. This confirms you need to run a cleaning cycle rather than checking cables or drivers.
Run this test before every cleaning attempt. It saves ink by ensuring you only clean when necessary. If the pattern looks perfect but pages are still blank, skip to the software section of this guide.
Execute Printhead Cleaning Cycles
Clogged nozzles are the number one reason an Epson printer stops printing. The built-in cleaning utility forces fresh ink through the head to dissolve dried residue.
Perform Standard Cleaning Procedure
Select Printhead Cleaning from the Maintenance menu on your screen. Choose Black or Color depending on which lines were missing in your test pattern. The process takes about two minutes and makes loud pumping noises.
Run a nozzle check after the cycle finishes. If gaps remain, repeat the standard cleaning up to three times. Most minor clogs clear within this window without needing aggressive measures.
Use Power Cleaning for Stubborn Blocks
If standard cleaning fails after three attempts, try Power Cleaning or Deep Cleaning. This mode pushes a larger volume of ink through the system to dislodge tough blockages.
Ensure your ink tanks are at least one-third full before starting. This process consumes significant ink, and low levels can introduce more air into the system. After running it, wait six to twelve hours for the ink to settle before testing again.
Clear Stuck Print Queue Jobs
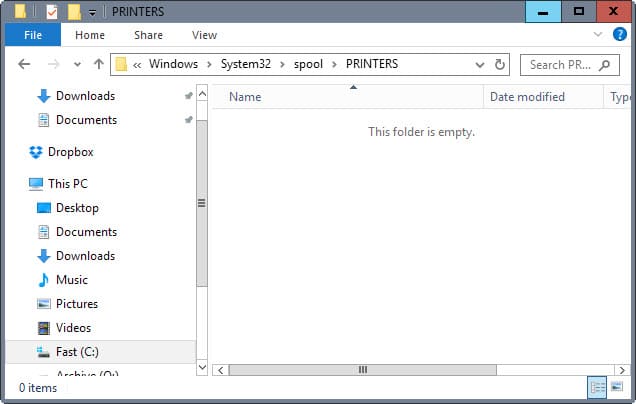
A single corrupted file in your print queue can block all subsequent jobs. Your computer thinks it sent the data, but the printer is waiting for a command that never completes.
Stop the Print Spooler Service
On Windows, press the Windows key and R, type services.msc, and hit Enter. Locate Print Spooler in the list, right-click it, and select Stop. This halts all printing activity temporarily.
Navigate to C:\Windows\System32\spool\PRINTERS on your computer. Delete every file in this folder. These files represent the stuck jobs causing the bottleneck.
Restart Spooler and Retry Printing
Return to the Services window and right-click Print Spooler again. Select Start to reactivate the printing system. Your queue should now be empty and ready for new tasks.
Try printing a simple test page from a different application. If the document prints, the issue was a software traffic jam. If it fails, proceed to driver updates.
Update or Reinstall Printer Drivers
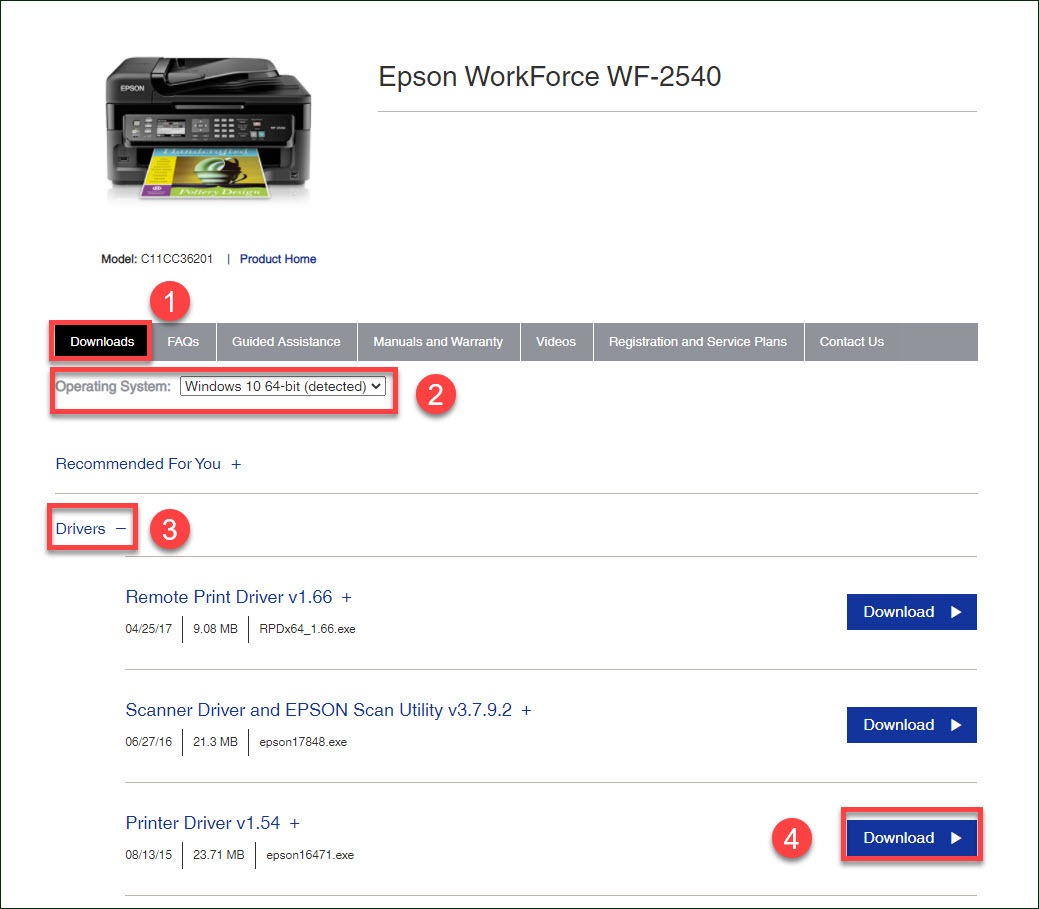
Outdated drivers often break communication between your operating system and the printer. A recent computer update might have replaced a working driver with an incompatible version.
Download Latest Official Drivers
Visit the official Epson support website and enter your specific model number. Download the full driver package for your current operating system version.
Run the installer and choose the Complete or Custom installation option. This ensures all necessary communication components and utilities are installed correctly. Avoid using generic drivers provided by Windows Update.
Perform Clean Driver Reinstallation
If updating does not work, uninstall the printer completely from your device settings. Remove the device from your list of printers and scanners, then restart your computer.
Reinstall the fresh driver package you downloaded earlier. This removes any corrupted configuration files that might be preventing the printer from receiving data.
Verify Wireless and USB Connections

Connection instability can mimic a hardware failure. Your computer might be sending data to a device that is no longer listening on the network.
Test Physical USB Cables and Ports
If using a wired connection, ensure the cable is snug in both the printer and computer ports. Try a different USB port on your computer, preferably one directly on the motherboard rather than a hub.
Swap the USB cable with a known working one if possible. Faulty cables are a common cause of intermittent connectivity that leads to print failures.
Reconnect Wireless Printer to Network
Your printer and computer must be on the exact same Wi-Fi network. If your router recently changed passwords or settings, the printer may have lost its link.
Use the Wi-Fi Setup menu on the printer control panel to reconnect. Enter your network password carefully. If issues persist, try moving the printer closer to the router to improve signal strength.
Configure Default Printer Settings
Your computer might be sending jobs to a different device, such as a PDF creator or another printer in the office. This makes it seem like your Epson unit is ignoring you.
Set Epson as Default Device
Go to your system settings for Printers and Scanners. Click on your Epson model and select Set as Default. This forces all applications to send jobs to this machine automatically.
Check the status line under the printer name. It should say Ready. If it says Offline, click it and uncheck Use Printer Offline to restore communication.
Review Print Dialog Preferences
Open the document you want to print and check the print dialog box. Ensure the correct paper size and type are selected to match what is in your tray.
Disable any options like Print to File unless you specifically need a digital copy. Also, verify that Grayscale mode is not selected if you expect color output.
Prevent Future Printing Failures
Regular maintenance prevents the majority of printing issues before they start. Small habits can save you from frustrating downtime later.
Print Test Pages Weekly
Ink dries out quickly when printers sit idle. Print a simple test page or nozzle check once a week to keep nozzles primed.
This habit keeps ink flowing through the head and prevents the formation of hard clogs. It is the single most effective way to maintain print quality.
Use Genuine Ink and Update Firmware
Third-party inks often have different chemical properties that lead to faster clogging. Stick with genuine Epson cartridges for reliable performance.
Check the Epson support site periodically for firmware updates. These updates often fix bugs and improve how the printer manages ink flow and connectivity.
Frequently Asked Questions About Epson Printer Issues
Why is my Epson printer saying it has ink but printing blank pages?
This usually indicates a clogged printhead or air bubbles in the ink line. Run a nozzle check to confirm blockages, then perform a standard cleaning cycle. If that fails, reseat your cartridges to ensure they are clicked in tightly.
How many times can I run the printhead cleaning cycle?
You should run the standard cleaning cycle up to three times in a row. If the issue persists, wait several hours before trying again to let the ink soften dried residue. Excessive cleaning wastes ink and can damage the system.
What does it mean when my Epson printer lights are blinking orange?
Blinking orange lights typically signal a paper jam, an empty paper tray, or a cartridge error. Check your paper path for obstructions and ensure cartridges are installed correctly. Consult your manual for specific flash pattern meanings.
Can I print if the maintenance box is full?
No, the printer will stop all operations if the maintenance box is full. This component collects waste ink from cleaning cycles. You must replace the maintenance box or reset the counter using official tools to resume printing.
Why does my wireless Epson printer show as offline?
This often happens if the printer and computer are on different Wi-Fi networks or if the signal is weak. Reconnect the printer to your network using the control panel and ensure both devices share the same IP subnet.
Key Takeaways for Fixing Your Epson Printer
Most “Epson printer not printing” issues resolve with a systematic approach starting with physical checks and moving to software fixes. Begin by verifying power, clearing paper jams, and reseating your ink cartridges to ensure proper contact.
Next, run a nozzle check and perform cleaning cycles to clear clogged nozzles. If hardware checks pass, clear your print queue and update your drivers to restore communication. Regular weekly printing prevents these issues from recurring.
Take action now by running a nozzle check on your device. If these steps do not resolve the issue, your printer may require professional service for a deep clean or part replacement.