Nothing ruins a 3D print faster than a failed first layer. Whether your filament peels up, ripples, or refuses to stick, these 3D printer first layer problems waste both time and money. The good news is that most causes are easy to identify and fix once you know what to look for.
Your first layer sets the foundation for the entire model. If it is uneven or warped, the rest of the print stands no chance of success. This guide shows you how to diagnose issues, adjust your settings, and achieve perfect adhesion every time.
Fix Rough or Uneven First Layers
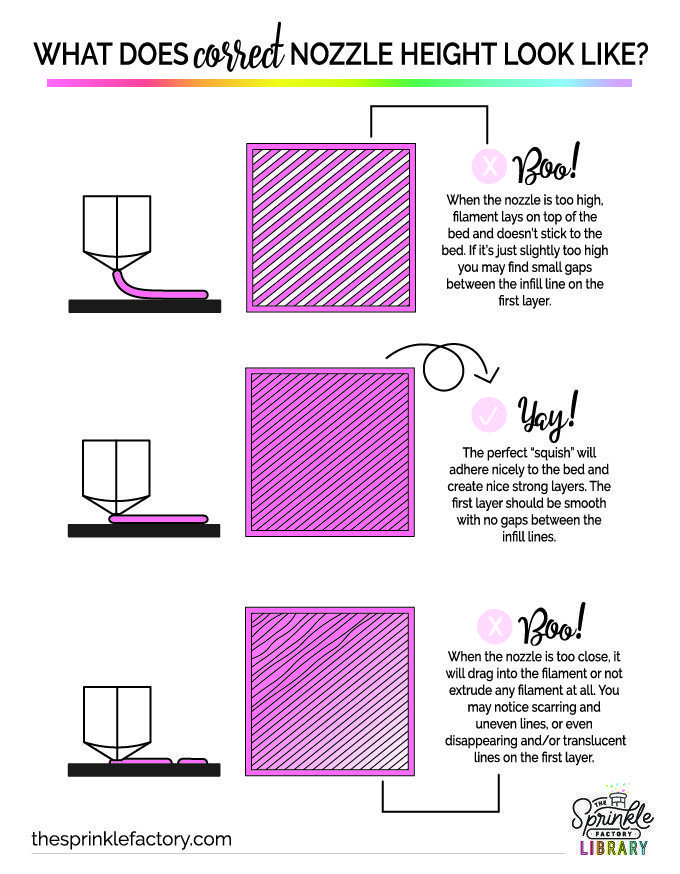
A rough or bumpy first layer usually means your nozzle sits too close to the build plate. This pressure squishes the filament instead of laying it down smoothly. You might hear scraping noises or see gaps where the extrusion fails completely.
Nozzle Too Close to Bed
Pressing the nozzle hard against the bed restricts filament flow and damages the surface. The result is a jagged, inconsistent layer that often lifts prematurely.
How to fix it:
* Perform a paper test to calibrate height so the sheet slides with slight resistance.
* Adjust the Z-offset in your printer firmware or menu.
* Re-level the bed manually or run your auto-leveling sequence again.
Dirty or Uneven Print Surface
Dust, oil, or old adhesive creates weak spots where new filament cannot bond properly. Even tiny debris can throw off adhesion across the whole build plate.
How to fix it:
* Clean the bed with isopropyl alcohol (IPA) after every few prints.
* Wash glass beds with mild dish soap and water for a deep clean.
* Replace damaged or warped beds if they have deep scratches.
Incorrect First Layer Height or Flow
Your slicer might be set for a specific height while the actual distance is smaller. This compression leads to over-extrusion and surface irregularities on the base.
How to fix it:
* Set first layer height to 105–120% of your standard layer height.
* Adjust the extrusion multiplier to 95–100% if you see blobbing.
* Run a single-wall test print to visually confirm even extrusion.
Stop First Layer Ripples
Ripples appear as waves or undulations on the surface of your print base. These disrupt accuracy and weaken the structural integrity of the model. While subtle, they often signal mechanical instability or speed issues.
Print Speed Too High
Printing the first layer too fast prevents proper adhesion and smooth extrusion. The nozzle moves faster than the filament can settle, creating rhythmic bulges.
How to fix it:
* Reduce first layer speed to 30–50 mm/s for better control.
* Set “Initial Layer Speed” to 50% of normal print speed in your slicer.
* Enable “Slow Down First Layer” options in Cura or PrusaSlicer.
Mechanical Instability
Loose belts, wobbly rails, or unsecured components cause vibrations during movement. These micro-movements transfer directly to the print head and show up as ripples.
How to fix it:
* Tighten X and Y-axis belts until they make a musical note when plucked.
* Check for loose pulleys, screws, or frame bolts that cause wobble.
* Ensure the printer sits on a stable, vibration-free surface.
Poor PID Bed Tuning
Fluctuating bed temperatures cause the filament to expand and contract unevenly. This thermal inconsistency leads to rippling patterns on the surface.
How to fix it:
* Run PID tuning for the bed using the G-code command M303 E-1 C8 S70.
* Save your new settings with the M500 command.
* Re-test first layer consistency after calibration completes.
Eliminate Elephant’s Foot
Elephant’s foot occurs when the bottom edges of your print bulge outward like a squished tire. This issue ruins dimensional accuracy, especially for parts that need to fit together precisely.
Over-Extrusion in First Layers
Too much plastic in the first few layers gets squeezed sideways because it cannot escape upward. This excess material creates a flared base that distorts measurements.
How to fix it:
* Lower the initial layer extrusion multiplier to 90–100%.
* Avoid setting flow rate above 100% unless correcting under-extrusion.
* Use flow calibration tests to verify accurate extrusion volume.
Bed Too Hot
High bed temperatures keep the first layers soft for too long. As new layers pile on, they press down and force the warm plastic outward.
How to fix it:
* Reduce bed temperature by 5–10°C (e.g., from 60°C to 50°C for PLA).
* Enable first layer fan cooling at 30–50% to harden the base.
* Increase the layer cooling delay so the base solidifies faster.
No Support Structure
Large flat bases without extra adhesion tools are more prone to spreading under pressure. The lack of anchor points allows the plastic to flare out.
How to fix it:
* Add a brim (5–10 mm) to anchor corners and resist outward force.
* Use a raft for challenging prints or temperature-sensitive materials.
* Design models with chamfered edges to hide minor foot effects.
Prevent First Layer Warping
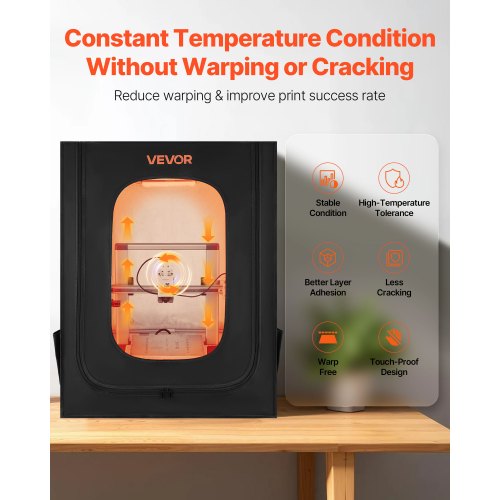
Warping happens when print corners lift off the bed due to uneven cooling. It is common with ABS and ASA, but even PLA can warp in drafty environments.
Rapid Edge Cooling
Plastic contracts as it cools down. When edges cool faster than the center, they shrink and pull away from the bed surface.
How to fix it:
* Enclose your printer to maintain a stable ambient temperature.
* Use an enclosure heater or space heater in cold rooms.
* Avoid placing the printer near vents, windows, or direct fans.
Weak Bed Adhesion
Even slight gaps in adhesion allow warping forces to take over quickly. Once one corner lifts, the rest of the print follows suit.
How to fix it:
* Apply adhesion aids like glue stick, hairspray, or ABS slurry.
* Use a brim or raft for high-risk prints with large footprints.
* Ensure the bed is perfectly level before starting every print.
Excessive Bed Temperature
While heat helps adhesion, too much can delay cooling and increase shrinkage stress. This imbalance causes the corners to curl upward.
How to fix it:
* Set bed temp to the recommended range for your filament type.
* Consider lowering by 5°C increments if warping persists.
* Monitor room temperature to ensure it does not exacerbate cooling issues.
Solve First Layer Not Sticking
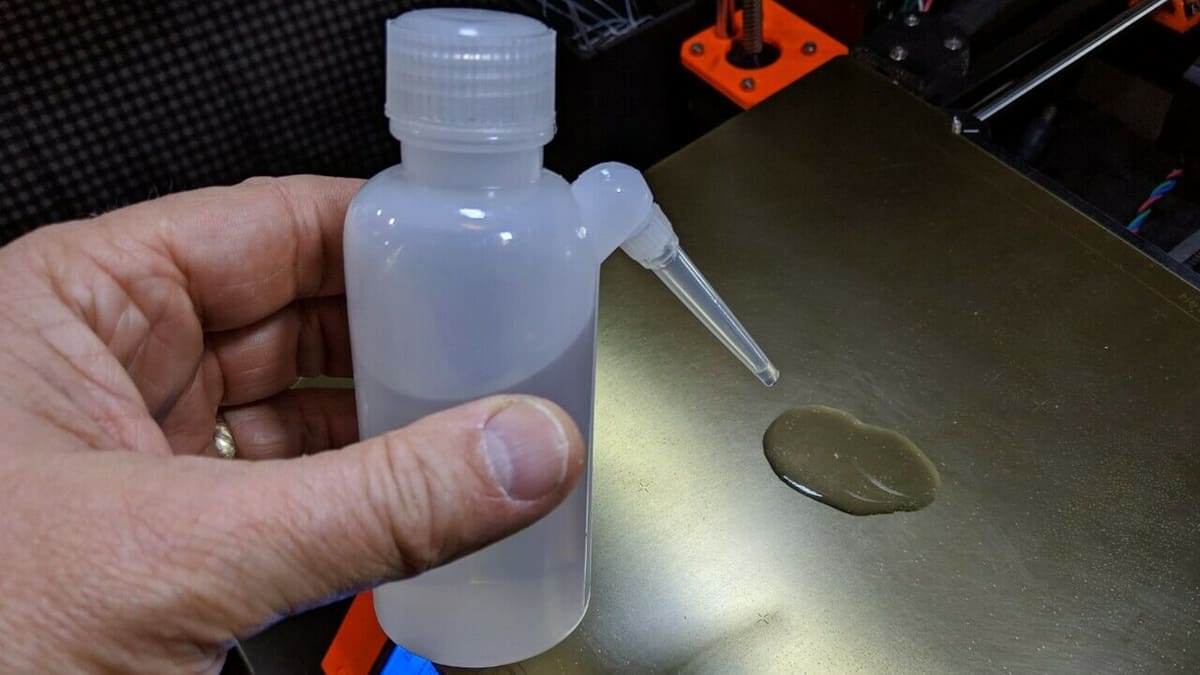
When the first layer does not stick, your print shifts, curls, or becomes a tangled mess. This is one of the most common and frustrating 3D printing failures you can face.
Oily or Dirty Print Bed
Skin oils, dust, or leftover adhesive create barriers that prevent proper bonding. These contaminants stop the filament from fusing to the build plate.
How to fix it:
* Wipe the bed with 70%+ isopropyl alcohol before printing.
* Clean stubborn residue with dish soap and warm water, then dry completely.
* Never touch the build surface with bare hands to avoid oil transfer.
Nozzle Too Far from Bed
If the gap is too large, filament will not press into the bed to form a strong bond. The material simply sits on top and cools without adhering.
How to fix it:
* Perform a paper drag test to ensure the nozzle barely catches the paper.
* Adjust Z-offset in firmware or via your touchscreen menu.
* Re-run manual or automatic bed leveling procedures.
Filament Moisture
Wet filament sputters, bubbles, and extrudes inconsistently during printing. This is especially common with hygroscopic materials like PLA and PETG.
How to fix it:
* Store filament in sealed containers with desiccant packs.
* Dry spools for 4–6 hours at 50–60°C using a filament dryer.
* Listen for hissing or popping sounds during extrusion as warning signs.
Optimize Settings for Perfect First Layers

Even with a clean bed and good hardware, wrong slicer settings can sabotage your first layer. These adjustments ensure optimal adhesion, flow, and cooling for every print.
Clean the Print Surface Regularly
A clean bed is non-negotiable for success. Residue builds up over time and significantly weakens adhesion between layers.
Best practices:
* Clean with IPA after 2–3 prints to remove oils.
* Deep clean weekly with soapy water for stubborn grime.
* Replace damaged PEI sheets or glass plates immediately.
Use Automatic Bed Leveling
Manual leveling works, but auto-leveling gives more consistent results on large beds. Sensors measure multiple points to create a precise mesh map.
Tips:
* Run auto-leveling before critical prints for best accuracy.
* Check the mesh map for high or low spots on the bed.
* Combine with Z-offset fine-tuning for the best results.
Choose the Right Adhesion Method
Match your adhesion method to the specific filament type you are using. Different materials require different approaches for maximum hold.
| Filament | Recommended Adhesion |
|---|---|
| PLA | Clean bed, optional brim |
| PETG | Light glue stick, painter’s tape |
| ABS | Hairspray, ABS slurry |
| TPU | Blue tape, glue stick |
Avoid over-applying adhesives as they can cause ripples or poor release later.
Tune Slicer Settings
Small changes in your slicer make a big difference in print quality. Fine-tuning these parameters ensures a solid foundation.
- First layer height: 0.2–0.3 mm for a 0.4 mm nozzle
- First layer speed: 30–50 mm/s for stability
- First layer temperature: +5°C vs rest of print
- Bed temperature: Follow filament specifications strictly
- Use brim: 5–10 mm for large or tall prints
Pro tip: Print a first layer test square (20x20mm) to validate settings before starting long prints.
Key Takeaways for Fixing 3D Printer First Layer Problems
A flawless first layer is not magic but the result of mechanics, maintenance, and smart settings. By diagnosing issues early and applying targeted fixes, you can eliminate most common problems in minutes.
Remember that the first layer is the base of everything. If it fails, the whole print fails, but perfect adhesion sets you up for success. Start with a clean, level bed and calibrate your nozzle height using the paper test.
Key takeaways:
* Always start with a clean, level bed free of oils.
* Calibrate nozzle height carefully using the paper test.
* Slow down the first layer speed to 30–50 mm/s.
* Match bed temp and adhesion method to your filament type.
* Run test prints after any major change to settings.
With these strategies, you will spend less time fixing failed prints and more time creating high-quality 3D models. Your journey to perfect prints starts with mastering that critical first layer.
Frequently Asked Questions About 3D Printer First Layer Problems
How thin should the first layer of a 3D printer be?
The first layer should typically be slightly thicker than subsequent layers. A common recommendation is around 0.16 to 0.30 mm when using a standard 0.4 mm nozzle. This extra thickness helps with adhesion and compensates for minor bed imperfections.
What speed should I print the first layer?
You should print the first layer at around 30–50% of your regular print speed. A safe bet for most printers is between 30 and 50 mm/s. Slower speeds allow the filament to settle and bond properly to the build plate.
Is a thicker first layer height stronger?
No, print strength is usually indicated by infill percentage, not first layer thickness. In fact, over-extruding or making layers too thick can lead to poor bed adhesion and print failures rather than increased strength.
Why is my PLA not sticking on the first layer?
Failed adhesion often occurs due to a dirty print bed or incorrect nozzle height. Clean your bed with dish soap or isopropyl alcohol and ensure the bed is level. Also, verify that the nozzle is not too far from the surface.
How do I stop my first layer from warping?
Prevent warping by using a heated bed, enclosing the printer to stop drafts, and applying adhesion aids like glue stick. Using a brim or raft also helps anchor the corners of the print to the bed effectively.