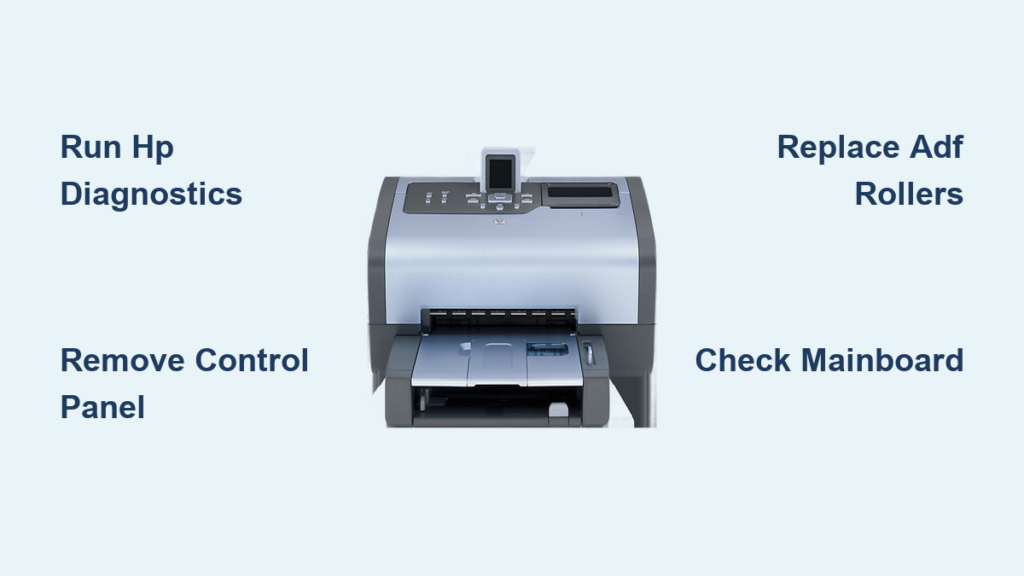
If your HP Photosmart printer has stopped working, you’re not alone. Models like the HP Photosmart 7520, 7510, 7525, and 7515 are known for reliable printing, but over time, hardware failures can interrupt that performance. Common problems include paper jams in the ADF, unresponsive control panels, and mainboard failures. Many of these issues can be fixed at home with the right approach. This guide on HP Photosmart printer repair walks you through official diagnostics and a complete disassembly process to reach internal parts safely.
By the end, you’ll know how to identify the problem, open your printer without breaking clips, replace faulty components, and put everything back together correctly.
Start with HP Diagnostic Tools Before Opening the Printer
Always rule out software or connectivity issues before taking anything apart.
Use the HP Smart App for Quick Fixes
Download the HP Smart app on mobile or desktop to troubleshoot common printer problems:
– Printer won’t connect to Wi-Fi
– Print jobs stuck in the queue
– Setup or alignment errors
The app runs automated checks and frequently resolves issues without physical repair.
Run HP PC Hardware Diagnostics
For deeper hardware faults, use HP PC Hardware Diagnostics for Windows when your printer is connected to a PC. This tool:
– Identifies hardware failures
– Generates a 24-digit Failure ID code if repair is needed
– Tests power, USB, and communication functions
Note: Diagnostics won’t detect physical damage like broken hinges or cracked covers. Those require a visual inspection.
When to Contact HP Support Directly
Reach out to HP when:
– The printer shows physical damage
– No lights turn on (possible power supply failure)
– Diagnostic tools fail to recognize the device
If you receive a 24-digit error code, enter it on HP’s repair portal along with your product number and location to start official service.
Prepare Your Workspace and Tools for Disassembly

This process applies to the HP Photosmart 7520, 7510, 7515, and 7525, which share identical internal layouts.
Power Down and Unplug Safely
- Turn off the printer using the power button
- Unplug the power cord from the wall outlet
- Open the front access door so the print head carriage moves to the center
- Lift the print head straight up to remove it
⚠️ Critical: Never skip unplugging. Internal capacitors can hold residual charge and damage components.
Gather the Required Tools
Using proper tools prevents stripped screws and broken clips:
– T10 star-shaped screwdriver for internal security screws
– Phillips screwdriver for plastic covers
– Flathead screwdriver for prying plastic tabs
– Small labeled containers for screws and small parts
Pro Tip: Tape screws to a labeled sheet showing their location to avoid confusion during reassembly.
Remove the Control Panel Assembly
The front display must come off early to reach internal connectors.
Release the Lower Screen Brackets
- Open the front panel fully until the screen lies flat
- Push the bottom edge of the screen to the right while lifting upward
- Disengage the panel from the lower mounting clips
✅ Visual cue: You will feel a slight release as the clips disengage.
Disconnect the Rear Retention Bar
- Locate the metal retention bar at the back of the screen
- Push the bar downward to unlock the top clips
- Pull the screen assembly forward gently
- Disconnect the ribbon cables from the mainboard
⚠️ Warning: Ribbon cables tear easily. Lift locking tabs gently using a plastic tool, not metal.
Remove the ADF Tray and Feeder Unit
The Automatic Document Feeder (ADF) is a frequent source of jams and misfeeds.
Slide Out the ADF Tray
- Open the ADF tray fully
- Press the center release button
- Slide the tray straight out
Store the tray in a safe spot to protect the rollers from dust and damage.
Disconnect the ADF Feeder Unit
- Lift the feeder unit slightly
- Locate the ribbon cable at the base
- Disconnect it from the mainboard socket
- Remove the entire assembly
With this removed, you can now reach the ADF roller set for cleaning or replacement.
Access and Remove the ADF Roller Set

Dirty or worn rollers cause most paper jam and double-feed problems.
Pry Open the ADF Housing Tabs
- Insert a flathead screwdriver into the side slot
- Push gently outward to release the plastic tabs
- Repeat on the opposite side
⚠️ Caution: The roller set contains a spring-loaded mechanism. Small parts can fly out when released.
Remove the Roller Assembly
- Once the side panels are open, slide out the roller set
- Keep springs and gears together as one group
- Inspect for wear, debris, or hardened rubber
Clean the rollers with isopropyl alcohol and a lint-free cloth. Replace any rollers that appear cracked or glazed.
Remove Front Moldings to Access Hidden Screws
Side moldings cover the screws that hold the front panel in place.
Detach the Right Side Molding
- Grasp the front edge of the right molding
- Pull it forward
- Rotate it to the right
- Push it back to disengage the clips
Detach the Left Side Molding
- Grasp the front edge of the left molding
- Pull it forward
- Rotate it to the left
- Push it back to release the clips
✅ Pro Tip: Rotate each molding toward its hinge to avoid snapping the plastic clips.
Once removed, the T10 screws holding the front panel become visible.
Remove the Front Panel and Side Covers
With the moldings off, you can expose the printer’s frame.
Unscrew and Remove the Front Panel
- Use the T10 screwdriver to remove all visible screws
- Lift the panel slightly
- Slide it toward you to disengage it from the frame
Set the panel aside with its screws in a labeled container.
Remove the Plastic Side Covers
- Use the Phillips screwdriver to remove cover screws
- Pull the covers off gently
- Label and store screws separately by location
You now have clear access to the printer’s internal components.
Disconnect Cables and Access the Mainboard
The mainboard controls all printer functions, so handle it last and carefully.
Remove the Side Panel for Mainboard Access
- Unscrew the side panel using the T10 driver
- Lift the panel to expose the mainboard
- Identify all ribbon cables and connectors
Disconnect All Internal Cables
Carefully disconnect the following:
– Control panel ribbon cable
– ADF feeder cable
– Power supply wires
– Motor connectors
✅ Best Practice: Photograph the cable layout before disconnecting so you remember the routing during reassembly.
Use a plastic tool to lift locking tabs. Never pull by the cable itself.
Remove the Top Housing to Expose the Mainboard
This final step gives you full access to inspect or replace the mainboard.
Unscrew and Lift the Top Cover
- Remove all Phillips screws securing the top housing
- Lift the cover straight up
- Set it aside in a safe location
The mainboard is now fully exposed. Look for burnt components, corrosion, or loose connectors before deciding on replacement.
Reassemble Your HP Photosmart Printer
Reassembly follows the reverse order of disassembly, but planning prevents mistakes.
Follow the Reverse Order
- Reinstall the top housing
- Reconnect all cables, verifying each is fully seated
- Replace the side and front covers
- Reattach the moldings
- Reconnect the control panel
- Insert the print head
✅ Critical: Every ribbon cable must lie flat and lock securely into its connector.
Test Before Final Closure
- Plug in the printer temporarily
- Power it on and watch for normal indicator lights
- Confirm the print head moves smoothly
- Run a test page
Only fully reassemble the printer once every function responds correctly.
Apply This Process to Common Repair Scenarios
This disassembly method supports several frequent HP Photosmart printer repair needs.
Fix Print Head Errors
- Remove the print head and clean the contacts with alcohol
- Replace it if prints show streaks or missing colors
- Check the carriage for debris before reinstalling
Replace Worn ADF Rollers
- Worn rollers are the leading cause of paper jams
- Replace them as a matched set for even feeding
- Lubricate gears lightly with silicone grease
Repair or Replace the Mainboard
- Replace the board if the printer has no power or won’t boot
- Match the part number exactly
- Transfer any daughterboards or metal shields to the new board
Clean Internal Components
- Remove dust and paper fragments with compressed air
- Focus on sensors and rollers
- Inspect the pickup roller for signs of wear or slippage
Prevent Future HP Photosmart Printer Failures
Regular maintenance extends your printer’s lifespan.
Clean the Print Head Monthly
- Open the HP Smart app
- Run the “Clean Print Cartridge” tool
- Repeat up to two times if quality doesn’t improve
Avoid letting ink dry inside the nozzles.
Maintain the ADF Rollers
- Wipe rollers monthly with a damp cloth
- Avoid alcohol on rubber surfaces, as it dries them out
- Store documents flat before feeding them in
Power Down Properly Every Time
- Use the on-screen menu to shut down before unplugging
- This prevents firmware corruption
- It also reduces wear on motors and gears
Frequently Asked Questions About HP Photosmart Printer Repair
Which HP Photosmart models use this disassembly process?
The steps in this guide apply to the HP Photosmart 7520, 7510, 7515, and 7525. These models share identical internal layouts, so the same disassembly sequence works for all four.
What is the 24-digit Failure ID code from HP diagnostics?
It is an error code generated by HP PC Hardware Diagnostics for Windows when the tool detects a hardware fault. You can enter this code, along with your product number and location, on HP’s repair portal to start an official service request.
Can I fix paper jams without taking the printer apart?
Yes. Many paper jams clear by opening the front access door and removing the print head. However, jams inside the ADF that keep recurring usually mean the ADF roller set needs cleaning or replacement, which requires partial disassembly.
What tools do I need for HP Photosmart printer repair?
You need three screwdrivers: a T10 star-shaped driver for internal security screws, a Phillips driver for plastic covers, and a flathead driver for prying plastic tabs. Labeled containers for screws are also recommended.
Will HP Smart app fixes avoid the need for disassembly?
Often, yes. The HP Smart app handles common problems like Wi-Fi connection failures, print queue errors, and alignment issues. Disassembly is only necessary when diagnostics point to a physical hardware fault.
When should I contact HP support instead of repairing myself?
Contact HP when the printer shows physical damage like broken hinges or cracked covers. You should also reach out if no lights power on (suggesting a power supply failure) or if diagnostic tools cannot detect the printer at all.
Final Thoughts on HP Photosmart Printer Repair
Repairing your HP Photosmart printer at home is realistic when you follow a clear sequence. Start with HP diagnostic tools to confirm the fault is hardware-related. Then follow the disassembly steps in order: control panel, ADF tray, rollers, moldings, front panel, side covers, cables, and finally the top housing. Keep screws labeled and photograph cable routing before disconnecting anything.
Whether you need to replace a worn ADF roller, swap a failed mainboard, or clean internal components, this process gives you full access safely. After reassembly, always run a test print before sealing everything up. With proper care, your HP Photosmart 7520, 7510, 7515, or 7525 can keep delivering quality prints for years.