Does your Epson printer produce streaky pages with missing colors despite running standard cleanings? When basic maintenance fails to clear stubborn clogs, an Epson printer power cleaning cycle can deeply flush the print head to restore quality.
This guide explains exactly when to use this powerful feature and how to perform it safely on Windows or Mac. You will learn essential safety checks, step-by-step instructions, and how to verify results without wasting excessive ink.
Identify When Epson Printer Power Cleaning Is Necessary

You should never treat power cleaning as a routine maintenance task. This aggressive process is designed specifically for persistent print quality issues that survive multiple standard cleaning cycles.
Recognize Specific Print Defects
Look for these clear signs that standard cleaning has failed:
* White streaks or gaps appearing in solid color blocks
* Entire colors missing from your printed documents
* Faint or patchy output even with full ink tanks
* Nozzle check patterns showing broken or incomplete lines
Run a nozzle check pattern first. If the pattern reveals missing nozzles and two standard cleanings do not fix them, you likely need the deeper action of Epson printer power cleaning.
Determine Frequency Limits
Limit this deep clean to once every few months at most. Overusing the feature leads to excessive ink consumption and accelerates wear on internal absorption pads. If you face constant print issues, investigate root causes like infrequent use or low-quality ink rather than repeating deep cleans.
Perform Essential Safety Checks Before Starting
Protect your hardware by confirming your printer is ready for this intensive process. Skipping these checks can lead to permanent print head damage.
Verify Ink Tank Levels
Every ink tank must be at least one-third full before you begin. The Epson printer power cleaning process forces a large volume of ink through the nozzles to clear blockages. Running this cycle with low ink levels can pull air into the system or dry out the print head, causing irreversible harm. Refill any low tanks immediately.
Observe Mandatory Waiting Periods
If a previous deep clean failed to resolve the issue, do not run it again immediately. Turn off your printer and wait at least 12 hours. This downtime allows dried ink inside the nozzles to rehydrate, significantly improving the success rate of the next attempt. Rushing this step wastes ink and yields poor results.
Execute Power Cleaning via Computer Utility
Using the official Epson software on your computer provides the most reliable method to initiate the cycle.
Steps for Windows Users
Follow this path to access the maintenance tools on a PC:
1. Click Start and open Control Panel, then select Devices and Printers.
2. Right-click your specific Epson printer icon and choose Printer properties.
3. Navigate to the Maintenance tab in the new window.
4. Click Head Cleaning and then select the Power Cleaning option.
5. Confirm the prompt and wait patiently for the process to complete, which takes 2 to 5 minutes.
Steps for macOS Users
Mac users can access the same tools through system settings:
1. Open System Settings or System Preferences on your Mac.
2. Select Printers & Scanners from the main menu.
3. Click your Epson printer and choose Options & Supplies.
4. Go to the Utility tab and open the Printer Utility.
5. Select Head Cleaning, choose Power Cleaning, and confirm to start.
Your printer will make loud pumping noises as it flushes the system. Do not turn off the device or interrupt the power supply during this time.
Use Alternative Manual Methods If Needed
Sometimes the computer utility cannot communicate with the printer, or the option is unavailable. In these cases, try manual methods directly on the device.
Operate Via Control Panel
Certain Epson models allow deep cleaning through the front buttons:
* Press the Maintenance or Ink button on the printer.
* Hold the button for 3 to 5 seconds until the cleaning cycle initiates.
* Consult your specific model manual for Epson printer power cleaning button combinations, as some require holding two arrow keys simultaneously.
Not every model supports this on-device deep clean. Check your user guide if the standard button hold only triggers a regular clean.
Address Cleaning Limit Counters
Occasionally, the printer software blocks repeated attempts to protect the hardware. If you see a “cleaning limit reached” message, you may need to wait longer or use specialized reset tools. Be aware that using third-party reset software is not officially supported and could void your warranty.
Verify Results After Cleaning Cycle

Never assume the process worked without testing. Verification prevents unnecessary ink waste and confirms print head health.
Print and Inspect Nozzle Check
Print a fresh nozzle check pattern using the maintenance button or computer utility. Examine the lines closely for all colors. They should appear continuous and solid with no gaps. If the lines look perfect, your Epson printer power cleaning was successful.
Decide on Further Action
If lines are still missing after the first attempt:
* Wait the required 12 hours again.
* Run one final power cleaning cycle.
* Print another nozzle check pattern.
Stop completely if there is no improvement after two deep cleaning attempts. Continuing further will not fix the clog and will only drain your ink supply. At this point, the blockage may be too severe for software fixes.
Understand Risks and Limitations Involved
While effective, this feature carries specific downsides that every user must acknowledge before proceeding.
High Ink Consumption Rates
This process uses up to 10 times more ink than a standard cleaning cycle. It forcibly purges the print head by drawing significant amounts from your tanks. Frequent use drastically increases your operating costs and requires more frequent cartridge replacements.
Ink Pad Saturation Concerns
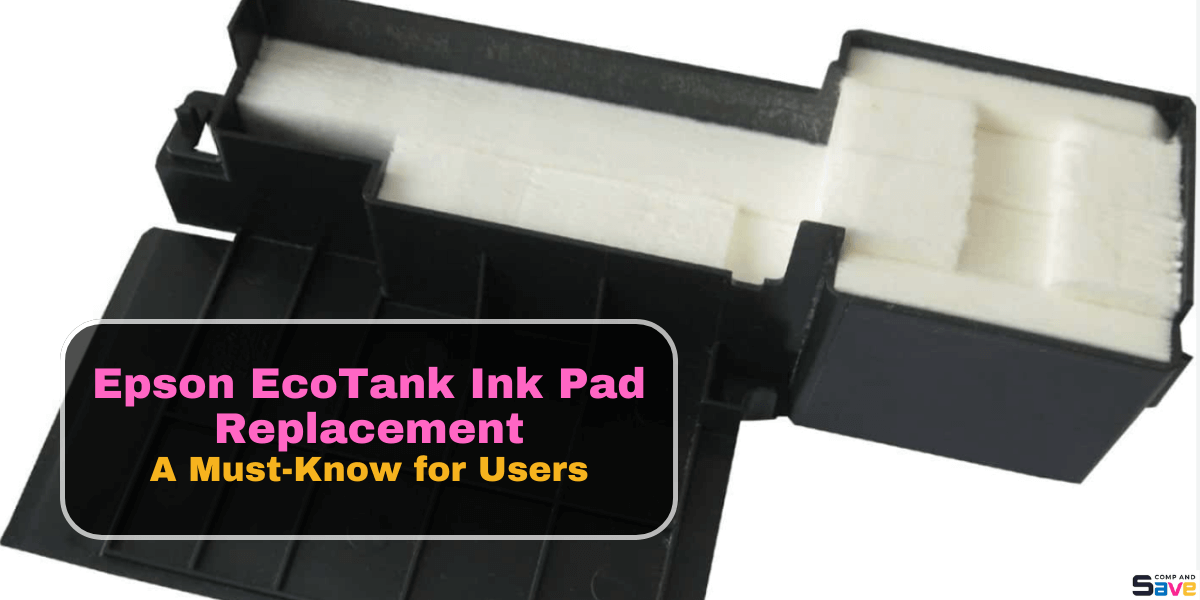
Internal waste ink pads absorb the excess ink flushed during cleaning. Epson printer power cleaning fills these pads much faster than normal use. Once saturated, the printer stops working and displays a “Service Required” or “Ink Pad Full” error. You cannot replace these pads yourself and must contact Epson support for service.
Prevent Future Clogs With Proper Care
Avoid the need for future deep cleans by adopting better printing habits.
Maintain Regular Printing Schedule
Run a short print job containing all colors every 1 to 2 weeks. This keeps ink flowing through the nozzles and prevents it from drying out and forming hard clogs. Infrequent use is the leading cause of print head issues.
Choose Genuine Supplies
Always use genuine Epson ink cartridges. Third-party or refilled inks often have inconsistent formulations that dry faster or clog nozzles more easily. Using authentic supplies also ensures your warranty remains valid if you need professional help later.
Troubleshoot Persistent Print Quality Issues
If your prints remain streaky after all attempts, the problem may exceed simple clogs.
Consider Professional Soaking
As a last resort for advanced users, you can remove the print head and soak it in a specialized cleaning solution for several hours. This requires technical skill and carries a high risk of damaging the printer if done incorrectly. Only attempt this if you are confident in your technical abilities.
Contact Epson Support
If the printer still fails to print cleanly, the print head may be permanently damaged or the waste pads full. Visit the official Epson support website to find authorized service centers. Professional diagnosis is often the safest path forward when software solutions fail.
Frequently Asked Questions About Epson Printer Power Cleaning
How much ink does a power cleaning cycle use?
A single cycle consumes a significant amount of ink, often equivalent to several pages of printing. It uses far more than a standard cleaning because it forcibly flushes the entire system to clear deep blockages.
Can I run power cleaning if my ink tanks are low?
No. You must ensure every tank is at least one-third full. Running the cycle with low ink can draw air into the print head or cause permanent damage due to lack of fluid pressure.
What should I do if power cleaning does not fix the streaks?
Turn off the printer and wait at least 12 hours before trying again. If a second attempt fails, stop the process to avoid wasting ink and contact Epson support for professional assistance.
Does power cleaning shorten the life of my printer?
Frequent use can saturate the internal waste ink pads faster, eventually requiring professional service. However, occasional use when necessary will not harm the printer if you follow safety guidelines.
Can I use third-party ink for power cleaning?
It is strongly recommended to use genuine Epson ink. Third-party inks may have different viscosities that clog nozzles faster or damage the print head during the high-pressure flushing of a power clean.
Key Takeaways for Successful Epson Printer Power Cleaning
Epson printer power cleaning is a powerful tool for fixing stubborn clogs that standard methods cannot clear. Remember to always check that your ink tanks are at least one-third full and wait 12 hours between attempts to let ink rehydrate.
Use this feature sparingly to avoid wasting ink and filling waste pads prematurely. If two deep cleaning cycles do not resolve your print quality issues, stop immediately and seek professional support to prevent further damage to your device.