You’ve clicked print, the printer whirs to life, and out comes your document, only it’s crammed into a corner, cut off at the edges, or shrunk down to half the page. If your printer is not printing full page, you’re not alone. This frustrating issue affects HP, Brother, and other major brands, as well as applications like Microsoft Word. Whether content appears in the upper left corner, gets clipped at the bottom, or prints at 50% size, the fix is often simpler than you think.
The root cause usually lies in print settings, driver issues, or paper configuration, not hardware failure. In most cases, adjusting scaling, margins, or updating drivers resolves the problem in minutes. This guide walks you through every possible fix, from quick checks to deep system resets, so you can get full-page prints fast and avoid future issues.
Check Print Scaling Settings
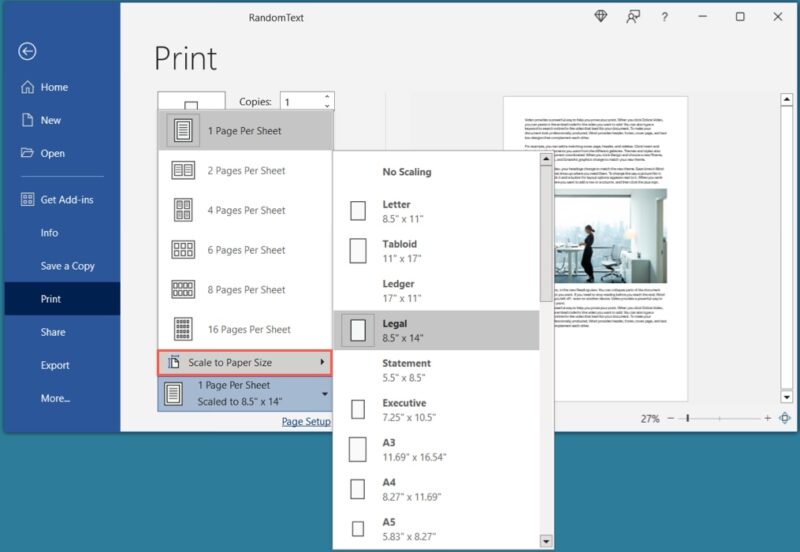
One of the most common reasons for small or partial prints is incorrect scaling.
Use “Actual Size” or “100% Scale”
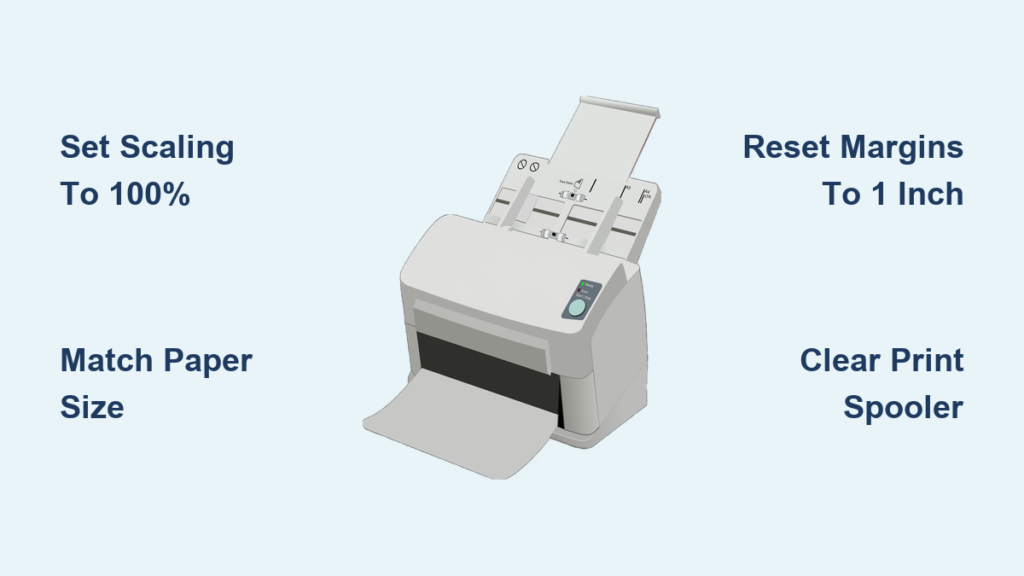
- Open the print dialog (Ctrl + P) and look for Scaling or Page Sizing.
- Select “Actual Size” or “100%”.
- Avoid “Fit to Page”, “Shrink to Fit”, or “Scale to Fit” since these automatically reduce content size.
Pro Tip: In Microsoft Word, scaling can be hidden under “More Settings” in the print dialog. Always verify it’s set to 100%.
Disable “Scale to Fit” in Printer Preferences
- Click Printer Properties or Preferences in the print dialog.
- Look for Layout, Effects, or Page Setup tabs.
- Ensure no “scale”, “fit”, or “zoom” options are enabled.
Match Paper Size in Document and Printer

Mismatched paper sizes cause content clipping or repositioning.
Confirm Document Page Size
- In Word: Go to Layout > Size and ensure it matches your paper (e.g., Letter or A4).
- In PDFs: Check File > Properties to confirm page size.
Set Correct Paper Size in Printer
- In the print dialog, verify the Paper Size dropdown matches the tray.
- In printer software (e.g., HP Smart), go to Printer Settings > Paper/Quality and confirm:
- Paper Size
- Paper Type (Plain, Inkjet, etc.)
Fix Custom Paper Size Issues
- If using non-standard paper, define it in the printer driver:
- Open Printer Properties > Paper > Custom Sizes.
- Enter exact dimensions and save.
Verify Page Margins and Orientation
Improper margins or orientation can push content off the printable area.
Reset to Default Margins
- In Word: Layout > Margins > Normal (1 inch on all sides).
- Avoid “Narrow” or “Mirrored” unless required.
- If margins seem off, go to Page Layout > Page Borders > Options and reset.
Warning: Word sometimes defaults to 24 points (about 0.33 inches). Change to 1 inch for full-page safety.
Check Portrait vs. Landscape
- Ensure Orientation in the print dialog matches the document.
- A landscape document printed in portrait mode often gets clipped or scaled.
Load Paper Correctly
Even perfect settings fail if paper isn’t loaded right.
Align Paper and Adjust Guides
- Fan the stack to prevent sticking.
- Place paper in the tray print-side down (for most inkjets).
- Adjust side and rear guides so they gently hold the paper with no gaps or tight pressure.
Don’t Overfill the Tray
- Keep paper below the maximum fill line.
- Overloading causes misfeeds and misalignment.
Use Compatible Paper
- For HP printers, HP-branded paper reduces compatibility issues.
- Avoid wrinkled, damp, or damaged sheets.
Clean Printheads and Check Cartridges
Low ink or clogged nozzles can cause incomplete prints.
Run a Nozzle Cleaning Cycle
- On HP: Settings > Tools > Clean Printheads.
- Perform 2–3 cycles if needed.
- Print a test page after each to check improvement.
Reinstall or Replace Cartridges
- Open the cartridge access door.
- Remove and reinsert each cartridge until it clicks into place.
- Replace if:
- Ink levels are low (check via HP Smart app).
- Nozzles are clogged and cleaning fails.
Update or Reinstall Printer Drivers
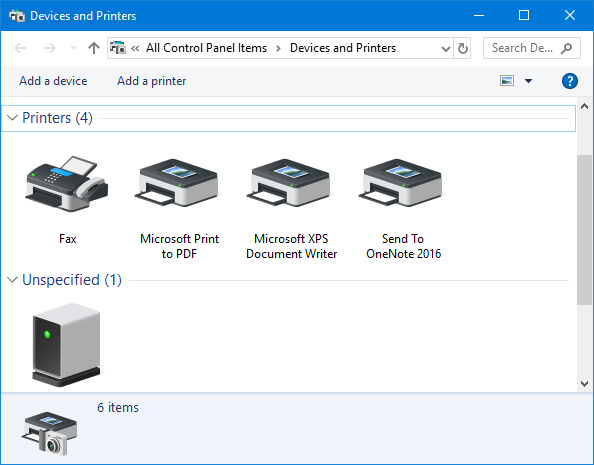
Outdated or corrupted drivers are a top cause of partial printing.
Download Latest Driver
- Go to the manufacturer’s site (e.g., HP Support).
- Enter your printer model and OS (e.g., Windows 10).
- Download and install the latest full feature driver.
Reinstall Driver Completely
- Uninstall current driver:
– Press Windows + X > Apps and Features.
– Uninstall the printer software.
– Open Devices and Printers, right-click printer > Remove Device. - Clear driver files:
– Open Command Prompt as admin.
– Run:printui.exe /s
– Go to Drivers tab, remove your printer’s driver. - Reinstall:
– Install the downloaded driver.
– Restart your computer.
Avoid third-party driver sites because they often bundle PUPs (potentially unwanted programs).
Restart Print Spooler Service
A stuck spooler can cause incomplete or failed prints.
Restart the Service
- Press Windows + R, type
services.msc, press Enter. - Find Print Spooler.
- Right-click > Restart.
Clear Print Queue
- Navigate to:
C:\Windows\System32\spool\PRINTERS - Delete all files (these are pending print jobs).
- Restart the Print Spooler service.
Warning: Do not delete the folder, only the files inside.
Test for Application-Specific Issues
If only Word prints incorrectly, the problem may be in Office.
Does It Happen in Other Apps?
- Try printing a text file (Notepad) or PDF.
- If those print full page, the issue is Word-specific.
Repair Microsoft Office
- Go to Settings > Apps > Apps & features.
- Find Microsoft Office, click Modify.
- Choose:
– Quick Repair (fast, no internet).
– If that fails, Online Repair (full reinstall). - Restart and test printing.
Check Word Page Setup
- Go to Layout > Page Setup (click the arrow in bottom-right).
- Under Paper tab: Confirm size and source.
- Under Layout tab: Check margins and header/footer spacing.
Run Windows Printer Troubleshooter
Let Windows diagnose common issues automatically.
Access the Troubleshooter
- Settings > System > Troubleshoot > Other Troubleshooters.
- Run the Printer troubleshooter.
- Follow prompts to apply fixes.
This tool often detects driver conflicts, spooler errors, or connectivity issues.
Print a Test Page
Isolate software vs. hardware problems.
Print from Printer Panel
- On the printer, go to Settings > Reports > Print Test Page.
- If the test page prints correctly, the issue is on your computer.
- If it’s also cut off or small, the problem is hardware-related.
Next Step: Contact manufacturer support or consider servicing.
Reset Printer to Default Settings
Corrupted settings can cause persistent scaling issues.
Restore Factory Defaults
- On printer control panel: Look for Settings > Reset > Restore Defaults.
- Reconfigure:
- Paper size
- Language
- Network (if needed)
Note: This clears custom settings, so re-enter them after reset.
Power Cycle Printer and Computer
Reset communication between devices.
Full Restart Procedure
- Turn off printer and unplug for 60 seconds.
- Restart computer.
- Plug in printer and turn it on.
- Wait for it to fully initialize.
- Try printing again.
This clears temporary memory and resets USB/network connections.
When to Suspect Hardware Failure
Software fixes won’t help if the printer itself is failing.
Signs of Hardware Issues
- Test page also prints incomplete.
- Unusual noises during printing.
- Flashing lights or error codes.
- Persistent paper jams.
Contact Manufacturer Support
- Visit official support site (e.g., HP, Brother).
- Use live chat or call support.
- Check warranty status because your printer may qualify for repair or replacement.
Prevent Future Full-Page Printing Issues
Avoid recurrence with these best practices.
Regular Maintenance
- Clean printheads monthly if used infrequently.
- Update drivers every 3–6 months.
- Run test prints after major Windows updates.
Use Manufacturer Software
- Install HP Smart, Canon PRINT, or Brother iPrint&Scan.
- These apps often provide better control than generic Windows printing.
Keep a Troubleshooting Log
- Note when issues occur, what was printed, and settings used.
- Helps identify patterns (e.g., only after Windows updates).
Quick Fixes Checklist (Do This First)
✅ Set scaling to 100% or Actual Size
✅ Match document and printer paper size
✅ Use Normal margins (1 inch)
✅ Confirm Portrait/Landscape is correct
✅ Load paper with proper guides
✅ Run printhead cleaning
✅ Update or reinstall printer driver
✅ Restart Print Spooler and clear queue
✅ Print a test page from printer
✅ Power cycle printer and computer
✅ Repair Office if Word-specific
Frequently Asked Questions About Printer Not Printing Full Page
Why is my printer printing in the upper left corner?
This usually happens when scaling is set to “Fit to Page” or “Scale to Fit” instead of 100%. Check the print dialog’s scaling options and set it to Actual Size. Also verify your paper size matches between the document and printer settings.
How do I fix my printer printing only half the page in Word?
Open Layout > Page Setup and verify both the Paper and Layout tabs. Set margins to Normal (1 inch) and confirm paper size matches your physical paper. If the issue persists, run Quick Repair on Microsoft Office via Settings > Apps.
Can outdated drivers cause partial printing?
Yes. Outdated or corrupted printer drivers are a leading cause of partial page output. Download the latest driver from your printer manufacturer’s website and reinstall it completely for best results.
How do I clear a stuck print spooler?
Press Windows + R, type services.msc, and restart Print Spooler. Then navigate to C:\Windows\System32\spool\PRINTERS and delete all files inside (not the folder itself). Restart the service again afterward.
Why does my printer’s test page print correctly but documents don’t?
This means your printer hardware works fine and the issue lies in your computer’s software or settings. Focus on fixing scaling, paper size, margins, and driver configuration. Application-specific issues (like Microsoft Word) may require repairing or resetting Office.
When should I contact manufacturer support for a printer not printing full page?
Contact support after exhausting all software fixes (scaling, drivers, spooler, margins) and if the printer’s own test page also prints incorrectly. Signs of hardware failure include unusual noises, flashing error lights, or persistent paper jams.
Key Takeaways for Fixing Printer Not Printing Full Page
Most printer not printing full page issues come down to software, not hardware. Start with the three quickest fixes: set scaling to 100%, match paper sizes, and verify margins are at 1 inch. If those don’t work, move to driver updates and clearing the print spooler queue.
If only one application (like Microsoft Word) shows the problem, repair your Office installation. As a last resort before calling support, print a test page directly from your printer to confirm whether the issue is on your computer or the hardware itself. With these steps, you can fix full-page printing problems in minutes without a technician.